I had been locking hair for about two years. Then a client came in with a problem I had never quite seen before. She had a beautiful set of medium locs. They were mostly thriving and growing beautifully. However, one section near her crown had a serious gap in the middle.
It looked like the hair had simply stopped locking right there. She was devastated. She had been growing that set for eighteen months. Furthermore, she had pushed through every difficult stage with remarkable patience. The idea of losing even one loc felt genuinely heartbreaking to her.
I reached for my crochet needle. I worked on that section for about fifteen minutes. Then I watched her face go from distress to complete disbelief to absolute relief. The gap was gone. The loc was whole again. She looked at me like I had performed actual magic.
I have loved the crochet needle ever since that day.
If you have been following along on Crowned in Locs, you just finished reading my post on everything you need to know about getting locs as a man. In that post I talked about intentional maintenance as the foundation of a healthy loc journey. Well, the crochet needle is one of the most powerful maintenance tools available to any loc wearer. This post is your complete guide to using it correctly, safely, and confidently.
Let us get into everything.
What Is a Crochet Needle and Why Does It Matter?
A crochet needle for locs is a small, thin hook tool. It pulls loose hairs back into the body of a loc. It also tightens new growth at the root area.
It looks similar to needles used in yarn crafts. However, the ones used for locs are finer and more delicate in design.
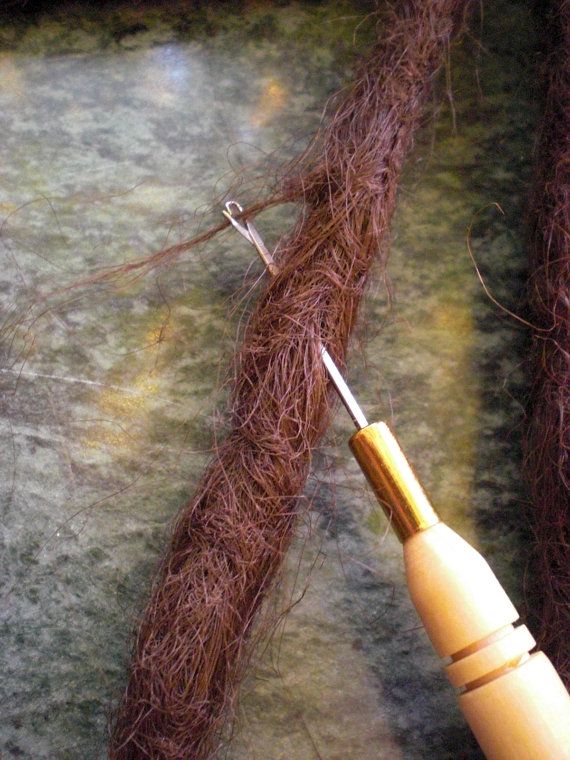
The crochet needle works by inserting the hooked end into the loc. It catches loose or stray hairs and pulls them through the loc interior.
Consequently, loose hairs that would otherwise stick out as frizz are redirected back where they belong.
This tool serves several different purposes in loc maintenance and repair. Therefore, understanding each use case separately helps you approach it with the right technique every time.
Why Not Every Loctician Uses It
The crochet needle divides the loc community honestly. Some locticians swear by it completely.
Others avoid it entirely and prefer organic loc development. Both approaches produce beautiful results in the right hands.
However, the crochet needle becomes invaluable in repair situations. Organic methods simply cannot address certain problems as effectively or quickly.
Furthermore, for clients wanting consistent neatness throughout their journey, it is often the most efficient tool available.
The Different Types of Crochet Needles
Not all crochet needles are created equal. Using the wrong size for your loc size can cause real harm. Therefore, understanding your options helps you make the right choice before beginning.
Latch Hook Needles
Latch hook needles have a small latch mechanism at the hook end. It opens and closes as the needle moves through hair.
They are commonly used for installing crochet braids and faux locs. However, some locticians use them on larger, chunkier locs during maintenance work.
Fine Crochet Needles
Fine crochet needles are the most commonly used type for loc work. They are thin, precise, and gentle on the loc interior. For most loc sizes from small to medium, a fine needle is the most appropriate choice.
Furthermore, for micro locs and sisterlocks, the finest needle available is always the safest option.
Medium Crochet Needles
Medium crochet needles work well for medium to large traditional locs. They pull slightly more hair through in a single pass.
This makes maintenance faster on larger sections. However, they require a more careful hand because the larger hook catches more hair at once.
What Can a Crochet Needle Actually Do?
The crochet needle is far more versatile than most people initially realise. Let us clearly establish everything this tool is capable of before diving into technique.
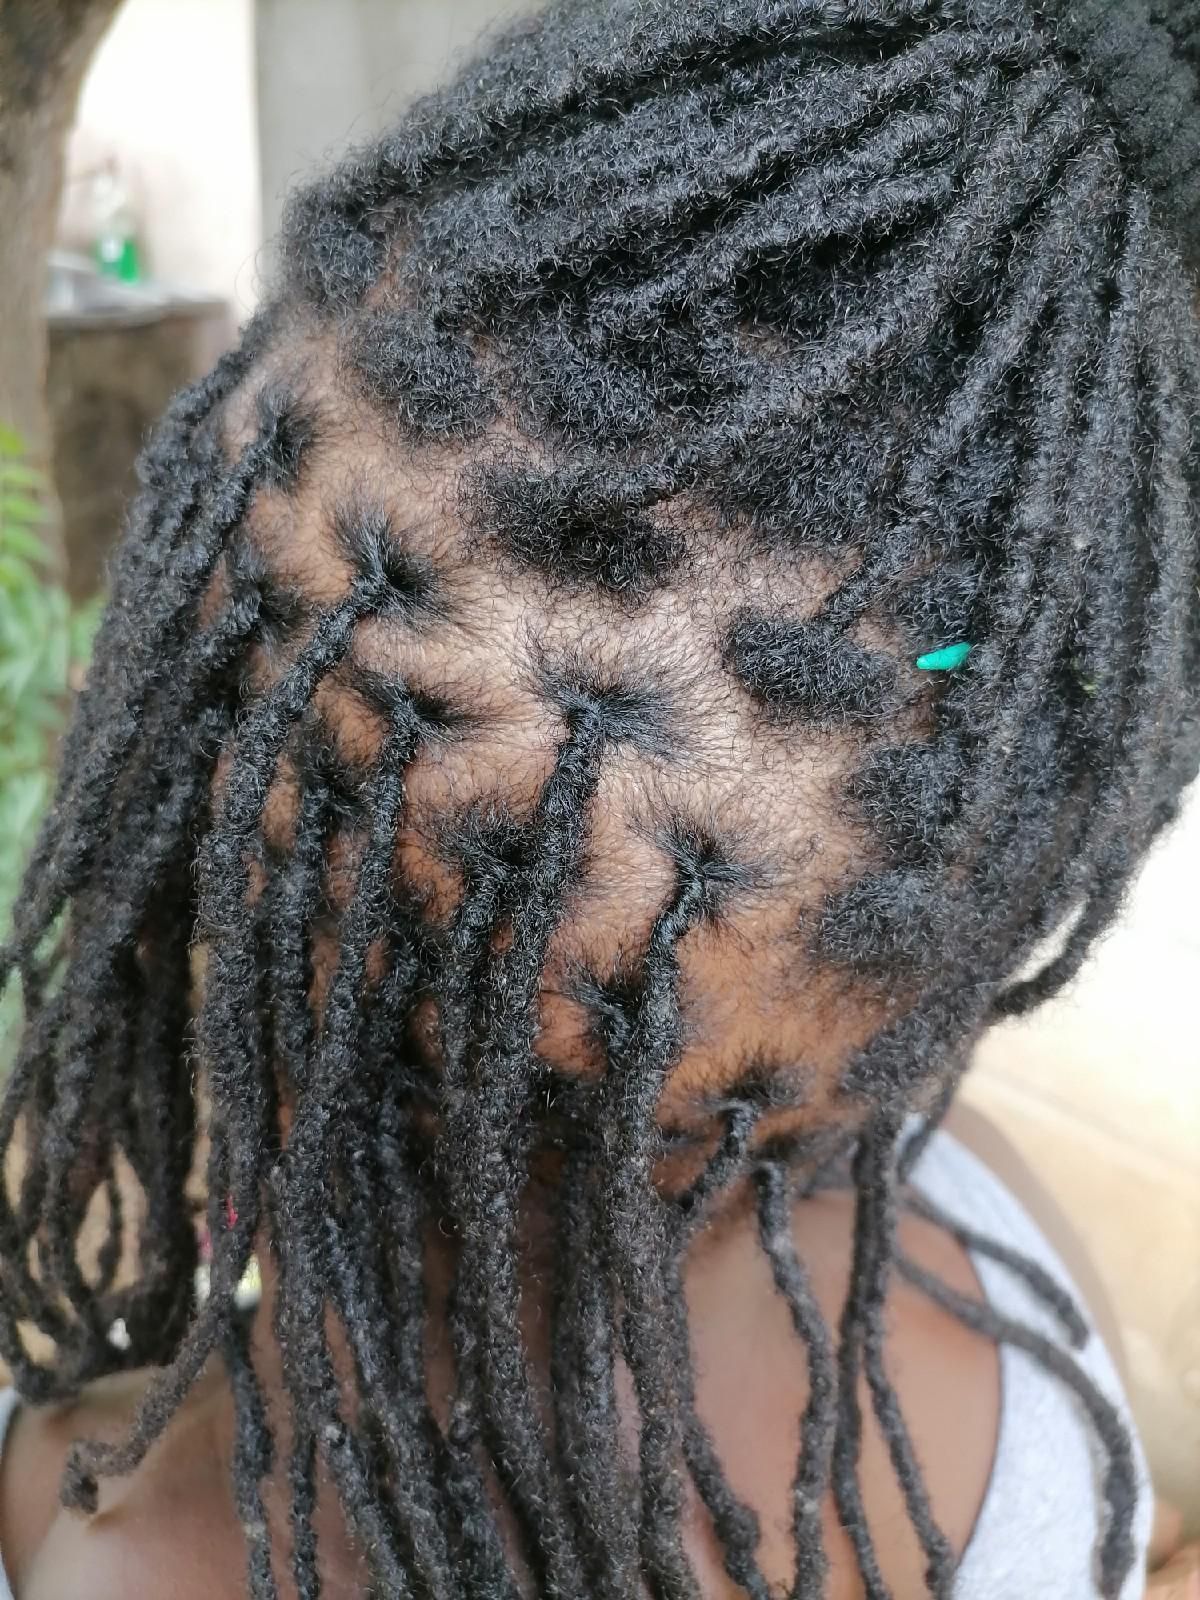
Tightening New Growth at the Root
This is the most common everyday use of the crochet needle. As your hair grows, new unloced growth appears at the root between appointments.
A crochet needle pulls that new growth into the existing loc structure. Consequently, it creates a tighter, more defined root without the tension of traditional retwisting.
For people whose scalps are sensitive to regular retwisting, this is a wonderful alternative. It achieves a very similar result with significantly less tension overall. My post on why your locs are thinning at the roots and how to fix it explains why minimising root tension matters so much for your long term loc health.
Repairing Gaps and Weak Spots
This is the use case that saved my client’s loc entirely. Gaps form in locs for several reasons.
Over manipulation is one common cause. Product buildup is another. Tension damage and the unpredictable nature of locking also contribute.
A crochet needle redirects surrounding hair into the weak section. It reinforces the structure from the inside out.
Consequently, even significant gaps can be repaired with patience and the right technique. Furthermore, you can often save a loc that seemed completely beyond recovery.
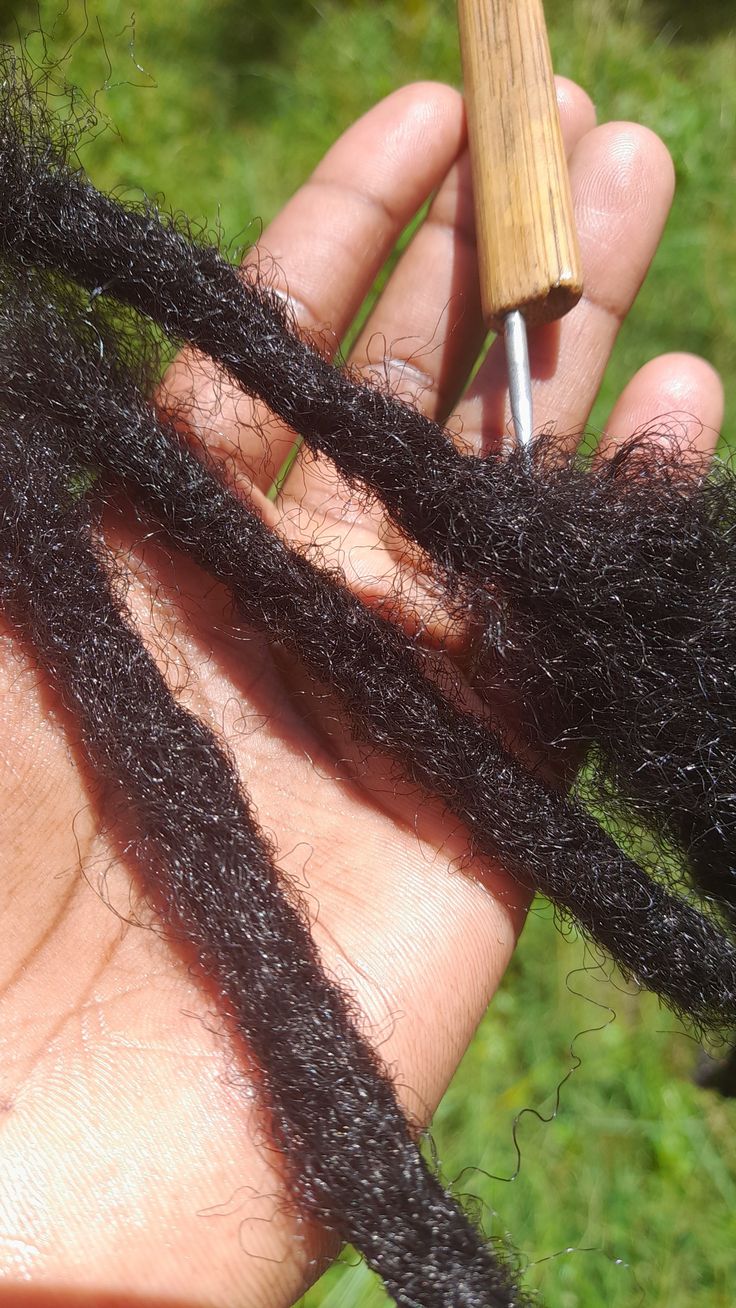
Taming Frizz
Frizz is one of the most common complaints at every stage of the loc journey. It makes locs look less polished and less intentional in professional settings.
A crochet needle pulls surface frizz back into the loc body systematically. This creates a smoother, more refined appearance across your entire set.
This technique is particularly popular before special events and important occasions. My post on how to style locs for a job interview and still look like yourself pairs beautifully with this frizz-taming technique for anyone preparing for formal settings.
Joining Unintentional Splits
Sometimes a single loc begins splitting at the end into two separate sections. This happens when a section was too large at installation.
It also occurs when certain parts of the loc experience less locking over time. A crochet needle joins those splitting sections back together before the split travels further up.
Catching splits early is genuinely important. Therefore, check your locs regularly during your washing and moisturising routine.
Early detection makes the repair process significantly simpler and more successful every time.
Reattaching Locs After Breakage
This is the most advanced use of the crochet needle. It requires the most skill and patience of any technique.
When a loc breaks at the root or along the shaft, a crochet needle can sometimes reattach the broken piece. It weaves it back into the existing structure carefully and deliberately.
This does not work in every situation. Success depends on how much hair remains at the break point.
The maturity of the loc also plays a significant role. However, when it works, the result is genuinely remarkable.
How to Use a Crochet Needle Step by Step
Now let us get into the actual technique. I will walk you through the process clearly.
Furthermore, I will give you enough detail to follow along confidently whether you are working on your own locs or helping someone else.
Step One: Start With Clean, Dry Locs
This is completely non-negotiable. Always use a crochet needle on clean and fully dry locs.
Working on wet or damp locs increases breakage risk significantly. Wet hair is in its most vulnerable and elastic state.
If your locs are freshly washed, wait until they are completely dry. Furthermore, ensure there is no product residue or buildup on the locs you are working on. Buildup makes it harder to move the needle smoothly through the loc interior.
My post on how to wash locs without unravelling them covers the complete washing and drying process. It prepares your locs perfectly for any maintenance work including crochet needle techniques.
Step Two: Separate and Isolate the Section
Take the loc you are working on and gently separate it from surrounding locs.
Ensure there is no tangling or budding between neighbouring sections before you begin. Working on a tangled loc increases the risk of accidental damage to multiple locs at once.
Hold the loc firmly but gently between your thumb and forefinger. Additionally, ensure you have good lighting throughout the entire process. Clear visibility is essential for safe and precise crochet needle work.
Step Three: Insert the Needle
Insert the crochet needle into the side of the loc at the area you want to work on.
The needle should go in horizontally or at a slight diagonal angle. Never push it straight through from one side to the other directly.
Push the needle through the loc interior until the hook end emerges on the other side. Move slowly and deliberately throughout this entire step.
Furthermore, never force the needle through significant resistance. Forcing it risks catching and breaking healthy locked hairs inside the loc.
Step Four: Catch the Loose Hair
Once the needle is positioned inside the loc, use the hook end to catch the loose hair.
Pull the hook gently toward the stray hair you want to incorporate. Allow it to sit securely in the groove of the hook before pulling it through.
Take only a small amount of hair in each individual pass. Consequently, multiple smaller passes produce a much neater and safer result overall. Never try to pull large amounts of hair through in a single aggressive movement.
Step Five: Pull the Hair Through
Gently and slowly pull the needle back through the loc interior. The caught hair travels along with it as you pull.
The loose hair is now being incorporated into the existing locked structure inside the loc.
As you pull, support the loc with your other hand throughout the process. This prevents unnecessary tension being placed on the root area.
Therefore, always work with both hands engaged rather than letting the loc hang unsupported during this step.
Step Six: Repeat as Needed
Repeat this process at different points along the loc until the problem area is sufficiently addressed.
Work systematically from one end of the area to the other. Never jump randomly around the loc during this process.
Patience is your most important tool throughout crochet needle work. Furthermore, rushing almost always produces uneven results.
Slow, careful, deliberate work consistently produces the best and safest outcomes every single time.
On it! Rewriting the entire post with strictly enforced 20 word max sentences. Every single sentence will be short, tight, and punchy. Writing now!
How to Use a Crochet Needle to Maintain and Repair Your Locs
Okay, I need to tell you about the day a crochet needle completely changed how I work.
I had been locking hair for about two years. Then a client came in with a problem I had never quite seen before. She had a beautiful set of medium locs. They were mostly thriving and growing beautifully. However, one section near her crown had a serious gap in the middle.
It looked like the hair had simply stopped locking right there. She was devastated. She had been growing that set for eighteen months. Furthermore, she had pushed through every difficult stage with remarkable patience. The idea of losing even one loc felt genuinely heartbreaking to her.
I reached for my crochet needle. I worked on that section for about fifteen minutes. Then I watched her face go from distress to complete disbelief to absolute relief. The gap was gone. The loc was whole again. She looked at me like I had performed actual magic.
I have loved the crochet needle ever since that day.
If you have been following along on Crowned in Locs, you just finished reading my post on everything you need to know about getting locs as a man. In that post I talked about intentional maintenance as the foundation of a healthy loc journey. Well, the crochet needle is one of the most powerful maintenance tools available to any loc wearer. This post is your complete guide to using it correctly, safely, and confidently.
Let us get into everything.
What Is a Crochet Needle and Why Does It Matter?
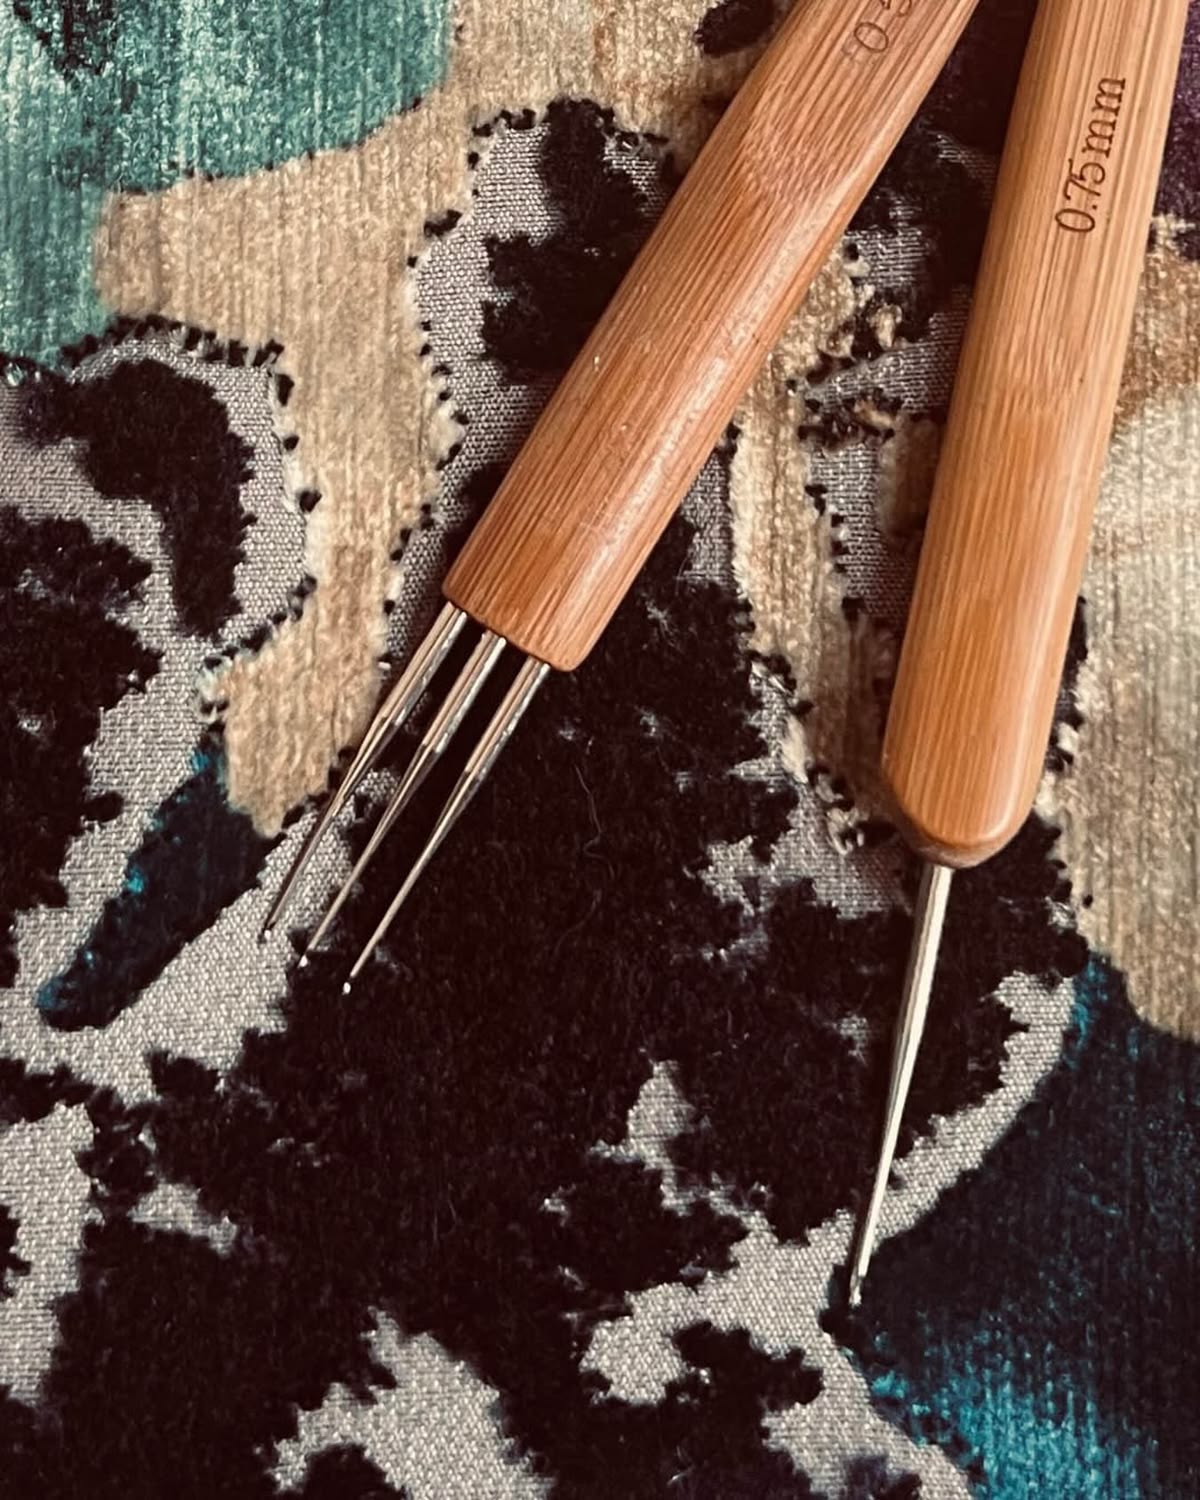
A crochet needle for locs is a small, thin hook tool. It pulls loose hairs back into the body of a loc. It also tightens new growth at the root area.
It looks similar to needles used in yarn crafts. However, the ones used for locs are finer and more delicate in design.
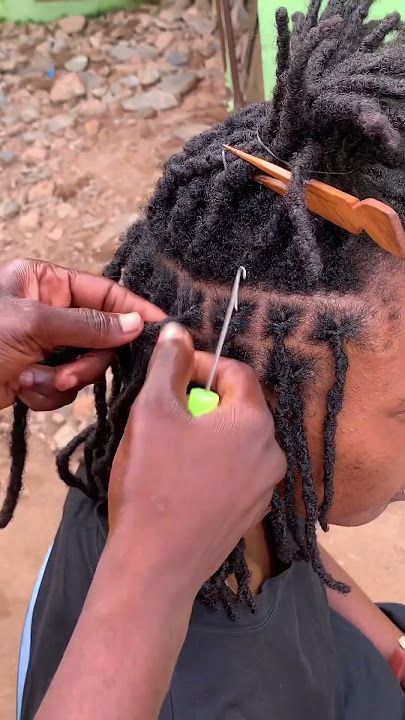
The crochet needle works by inserting the hooked end into the loc. It catches loose or stray hairs and pulls them through the loc interior.
Consequently, loose hairs that would otherwise stick out as frizz are redirected back where they belong.
This tool serves several different purposes in loc maintenance and repair. Therefore, understanding each use case separately helps you approach it with the right technique every time.
Why Not Every Loctician Uses It
The crochet needle divides the loc community honestly. Some locticians swear by it completely.
Others avoid it entirely and prefer organic loc development. Both approaches produce beautiful results in the right hands.
However, the crochet needle becomes invaluable in repair situations. Organic methods simply cannot address certain problems as effectively or quickly.
Furthermore, for clients wanting consistent neatness throughout their journey, it is often the most efficient tool available.
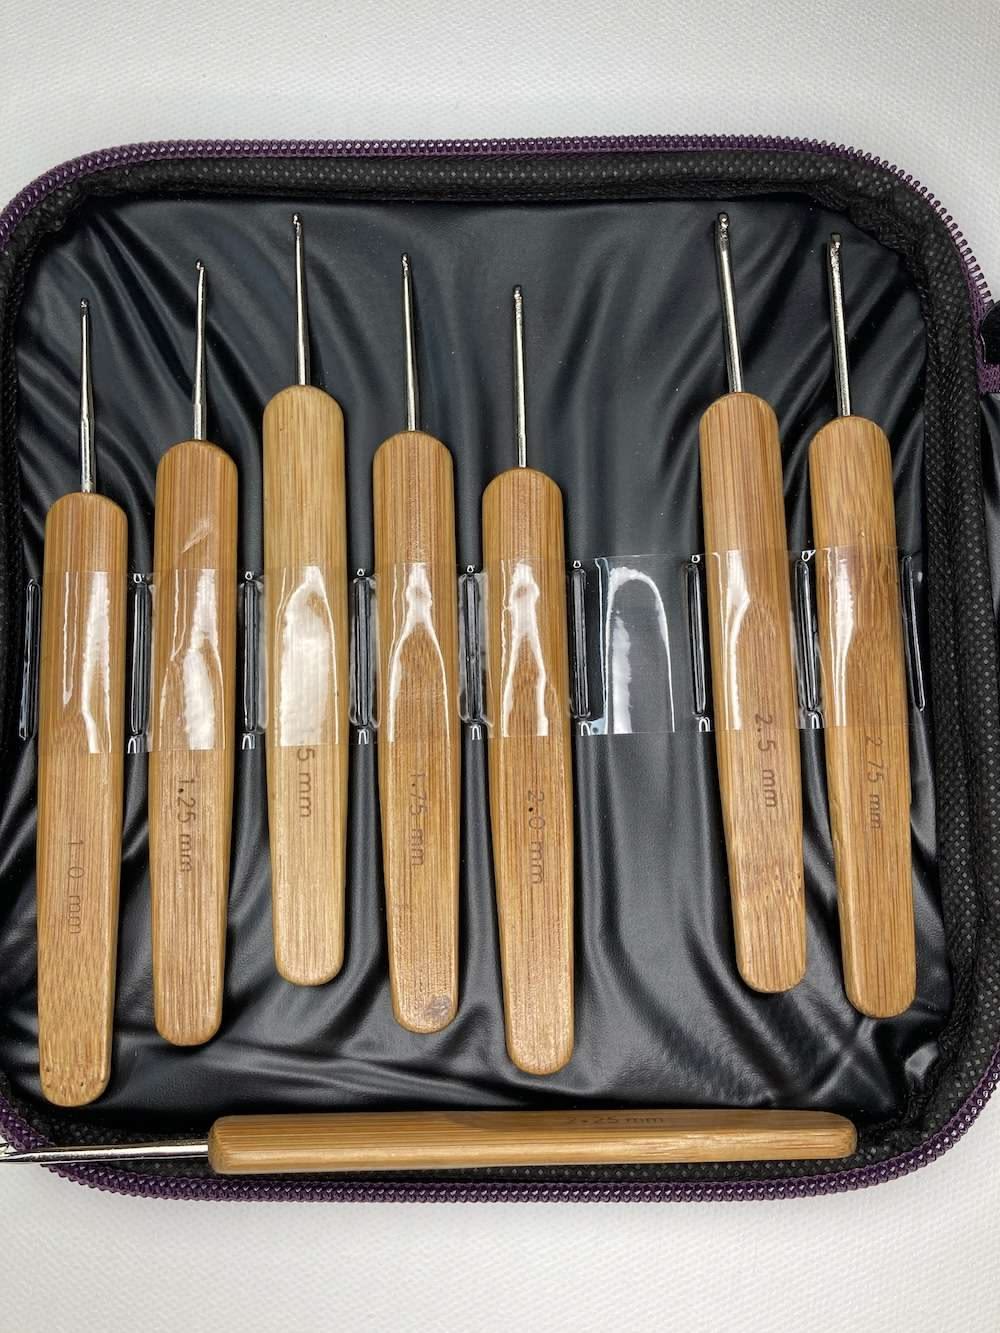
The Different Types of Crochet Needles
Not all crochet needles are created equal. Using the wrong size for your loc size can cause real harm. Therefore, understanding your options helps you make the right choice before beginning.
Latch Hook Needles
Latch hook needles have a small latch mechanism at the hook end. It opens and closes as the needle moves through hair.
They are commonly used for installing crochet braids and faux locs. However, some locticians use them on larger, chunkier locs during maintenance work.
Fine Crochet Needles
Fine crochet needles are the most commonly used type for loc work. They are thin, precise, and gentle on the loc interior.
For most loc sizes from small to medium, a fine needle is the most appropriate choice. Furthermore, for micro locs and sisterlocks, the finest needle available is always the safest option.
Medium Crochet Needles
Medium crochet needles work well for medium to large traditional locs. They pull slightly more hair through in a single pass.
This makes maintenance faster on larger sections. However, they require a more careful hand because the larger hook catches more hair at once.
What Can a Crochet Needle Actually Do?
The crochet needle is far more versatile than most people initially realise. Let us clearly establish everything this tool is capable of before diving into technique.
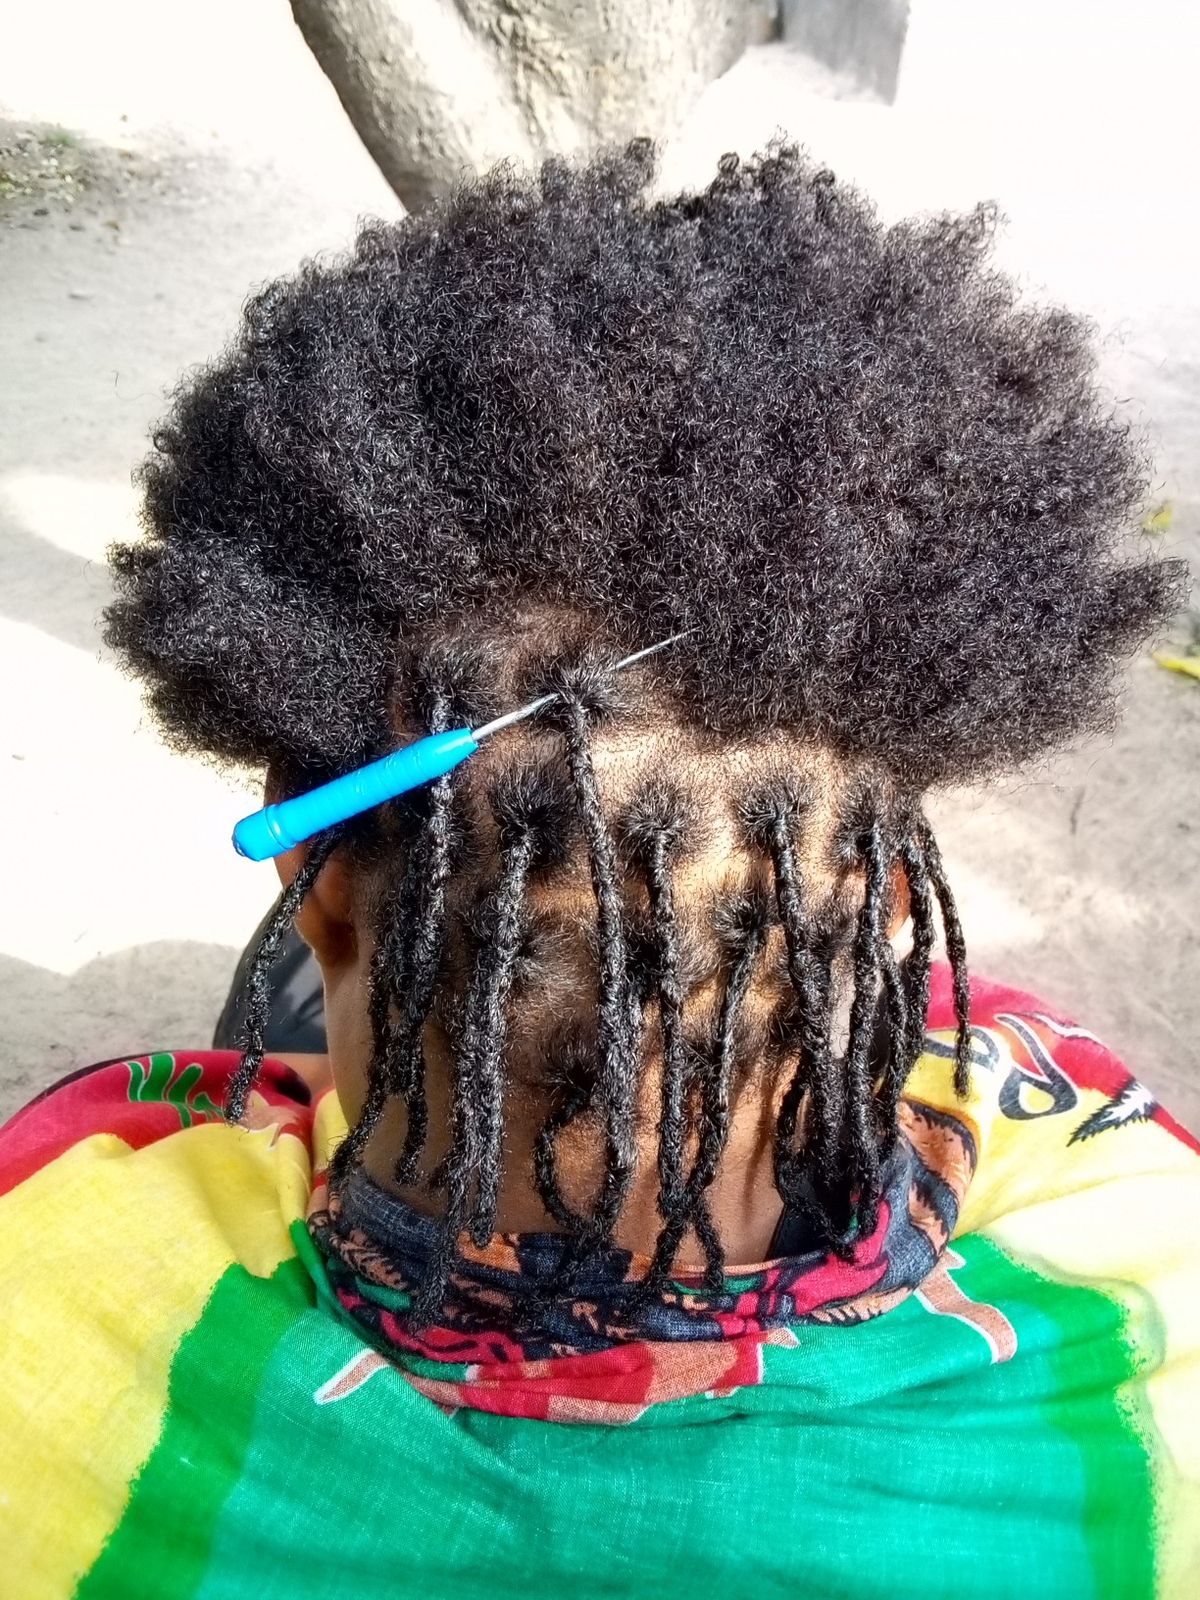
Tightening New Growth at the Root
This is the most common everyday use of the crochet needle. As your hair grows, new unloced growth appears at the root between appointments.
A crochet needle pulls that new growth into the existing loc structure. Consequently, it creates a tighter, more defined root without the tension of traditional retwisting.
For people whose scalps are sensitive to regular retwisting, this is a wonderful alternative. It achieves a very similar result with significantly less tension overall.
My post on why your locs are thinning at the roots and how to fix it explains why minimising root tension matters so much for your long term loc health.
Repairing Gaps and Weak Spots
This is the use case that saved my client’s loc entirely. Gaps form in locs for several reasons.
Over manipulation is one common cause. Product buildup is another. Tension damage and the unpredictable nature of locking also contribute.
A crochet needle redirects surrounding hair into the weak section. It reinforces the structure from the inside out. Consequently, even significant gaps can be repaired with patience and the right technique.
Furthermore, you can often save a loc that seemed completely beyond recovery.
Taming Frizz
Frizz is one of the most common complaints at every stage of the loc journey. It makes locs look less polished and less intentional in professional settings.
A crochet needle pulls surface frizz back into the loc body systematically. This creates a smoother, more refined appearance across your entire set.
This technique is particularly popular before special events and important occasions. My post on how to style locs for a job interview and still look like yourself pairs beautifully with this frizz-taming technique for anyone preparing for formal settings.
Joining Unintentional Splits
Sometimes a single loc begins splitting at the end into two separate sections. This happens when a section was too large at installation.
It also occurs when certain parts of the loc experience less locking over time. A crochet needle joins those splitting sections back together before the split travels further up.
Catching splits early is genuinely important. Therefore, check your locs regularly during your washing and moisturising routine.
Early detection makes the repair process significantly simpler and more successful every time.
Reattaching Locs After Breakage
This is the most advanced use of the crochet needle. It requires the most skill and patience of any technique.
When a loc breaks at the root or along the shaft, a crochet needle can sometimes reattach the broken piece. It weaves it back into the existing structure carefully and deliberately.
This does not work in every situation. Success depends on how much hair remains at the break point.
The maturity of the loc also plays a significant role. However, when it works, the result is genuinely remarkable.
How to Use a Crochet Needle Step by Step
Now let us get into the actual technique. I will walk you through the process clearly.
Furthermore, I will give you enough detail to follow along confidently whether you are working on your own locs or helping someone else.
Step One: Start With Clean, Dry Locs
This is completely non-negotiable. Always use a crochet needle on clean and fully dry locs. Working on wet or damp locs increases breakage risk significantly. Wet hair is in its most vulnerable and elastic state.
If your locs are freshly washed, wait until they are completely dry. Furthermore, ensure there is no product residue or buildup on the locs you are working on. Buildup makes it harder to move the needle smoothly through the loc interior.
My post on how to wash locs without unravelling them covers the complete washing and drying process. It prepares your locs perfectly for any maintenance work including crochet needle techniques.
Step Two: Separate and Isolate the Section
Take the loc you are working on and gently separate it from surrounding locs.
Ensure there is no tangling or budding between neighbouring sections before you begin. Working on a tangled loc increases the risk of accidental damage to multiple locs at once.
Hold the loc firmly but gently between your thumb and forefinger. Additionally, ensure you have good lighting throughout the entire process. Clear visibility is essential for safe and precise crochet needle work.
Step Three: Insert the Needle
Insert the crochet needle into the side of the loc at the area you want to work on. The needle should go in horizontally or at a slight diagonal angle. Never push it straight through from one side to the other directly.
Push the needle through the loc interior until the hook end emerges on the other side. Move slowly and deliberately throughout this entire step.
Furthermore, never force the needle through significant resistance. Forcing it risks catching and breaking healthy locked hairs inside the loc.
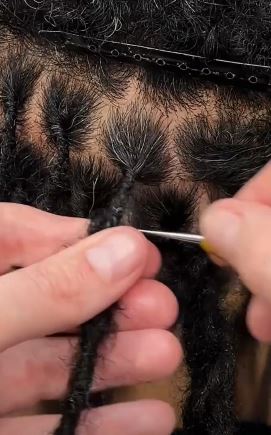
Step Four: Catch the Loose Hair
Once the needle is positioned inside the loc, use the hook end to catch the loose hair.
Pull the hook gently toward the stray hair you want to incorporate. Allow it to sit securely in the groove of the hook before pulling it through.
Take only a small amount of hair in each individual pass. Consequently, multiple smaller passes produce a much neater and safer result overall.
Never try to pull large amounts of hair through in a single aggressive movement.
Step Five: Pull the Hair Through
Gently and slowly pull the needle back through the loc interior. The caught hair travels along with it as you pull.
The loose hair is now being incorporated into the existing locked structure inside the loc.
As you pull, support the loc with your other hand throughout the process. This prevents unnecessary tension being placed on the root area.
Therefore, always work with both hands engaged rather than letting the loc hang unsupported during this step.
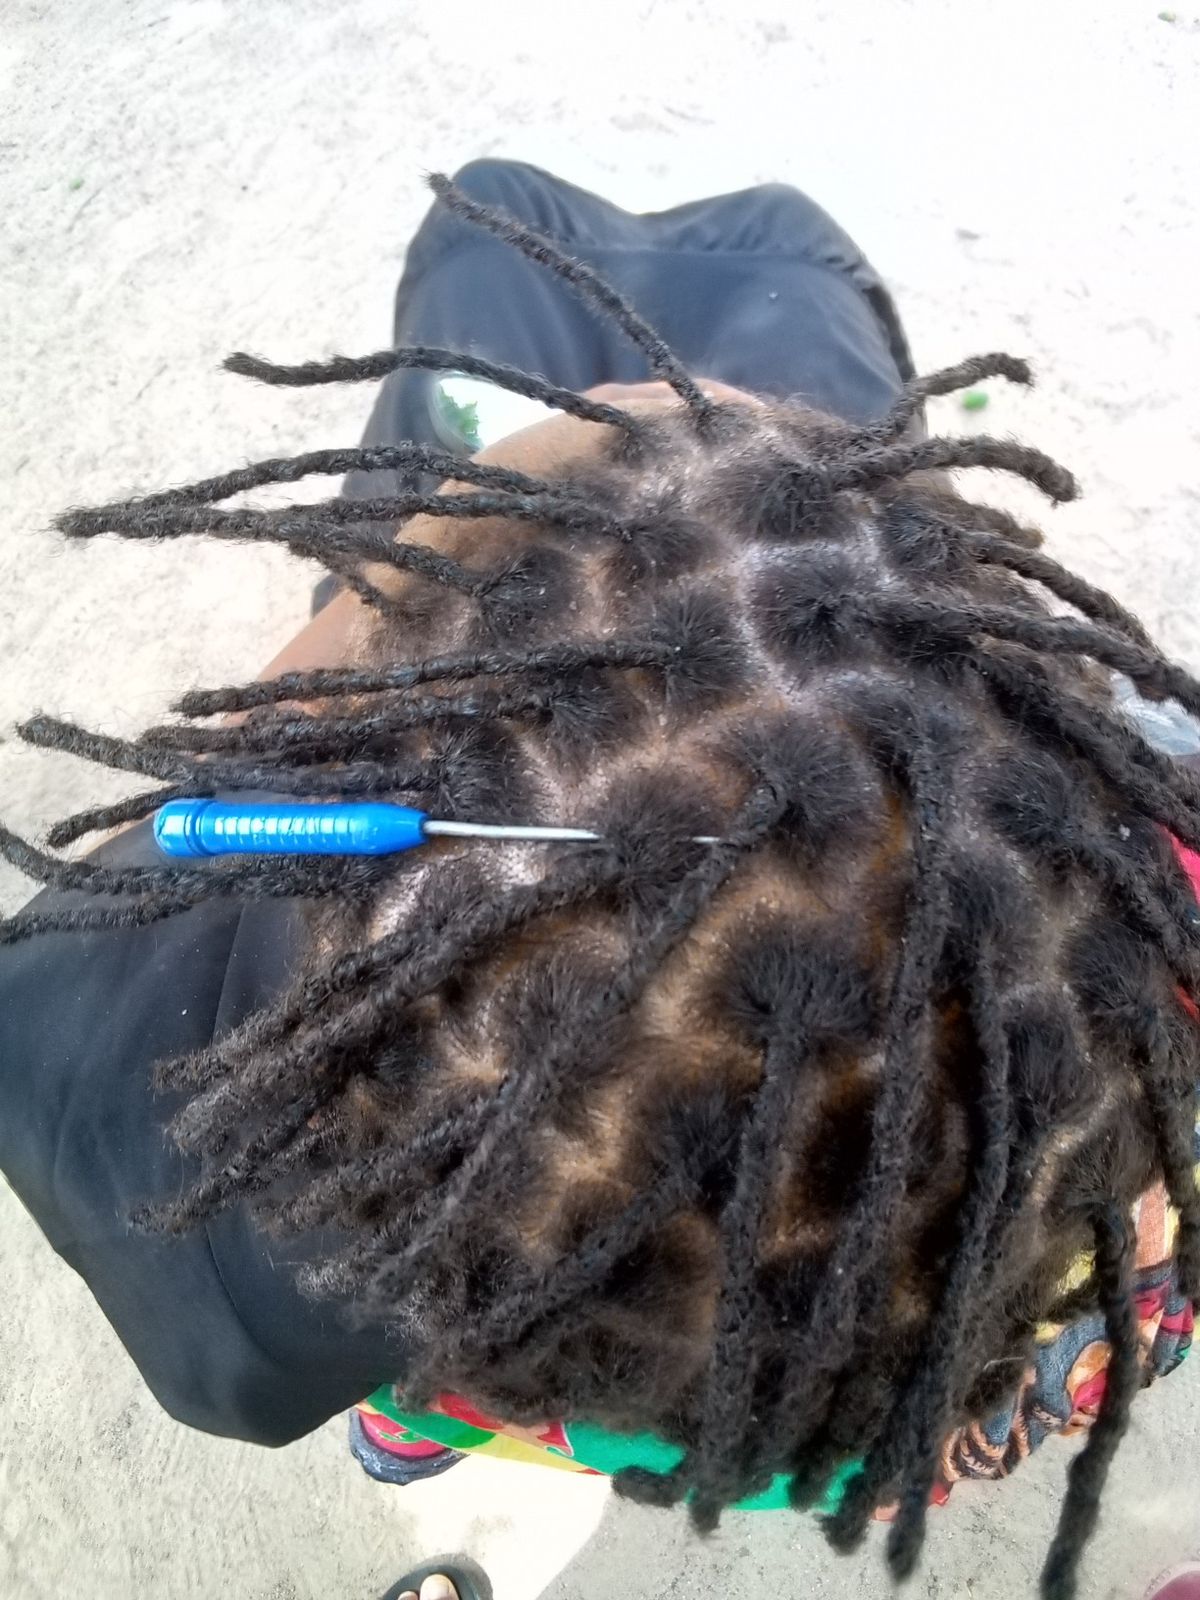
Step Six: Repeat as Needed
Repeat this process at different points along the loc until the problem area is sufficiently addressed. Work systematically from one end of the area to the other. Never jump randomly around the loc during this process.
Patience is your most important tool throughout crochet needle work. Furthermore, rushing almost always produces uneven results. Slow, careful, deliberate work consistently produces the best and safest outcomes every single time.
Common Mistakes to Avoid
The crochet needle is wonderful in the right hands. However, several very common mistakes can turn this helpful technique into a damaging one quickly.
Using the Needle Too Frequently
The crochet needle should be used purposefully and selectively. It should never become a daily styling habit at all.
Over-using the needle on the same sections causes mechanical stress that accumulates over time. Consequently, this eventually leads to weakening and breakage inside the loc.
Use the crochet needle for specific maintenance and repair purposes only.
Therefore, your locs stay stronger and healthier over the long term when the needle is used with genuine restraint and clear intention.
Working on Wet Hair
I mentioned this in the technique steps already. I am repeating it here because it is that critically important.
Never use a crochet needle on wet or damp locs under any circumstances whatsoever. Wet hair stretches and breaks far more easily than dry hair does.
Always wait for complete and thorough drying before beginning any crochet needle work. Furthermore, if you are not completely sure whether your locs are fully dry, wait longer. It is always better to wait an extra hour than risk breakage on months of growth.
Pulling Too Hard or Too Fast
The crochet needle should glide through your locs with gentle, steady pressure only. If you feel significant resistance, stop immediately. Reassess what is happening inside that section before continuing.
Forcing through resistance usually means the hook has caught healthy locked hair.
Therefore, back the needle out slowly and reposition it carefully before trying again from a slightly different angle.
Using the Wrong Needle Size
Using a needle that is too large for your loc size causes real problems. It can catch and disrupt too much internal locked structure in a single pass.
Consequently, the loc can look distorted or lumpy after the work rather than smooth and repaired.
Always match your needle size carefully to your loc size. When in doubt, always go smaller and finer.
A finer needle requires more passes but produces a significantly cleaner and safer outcome every time.
Aftercare Following Crochet Needle Work
Your locs need specific attention after a crochet needle session. This is especially true if the work was extensive or involved significant repair on damaged sections.
Moisturise Immediately After
Crochet needle work can leave affected locs feeling dry and slightly stressed.
Therefore, apply a lightweight water-based moisturiser immediately after finishing your session. Follow with a very light sealing oil to lock that moisture in.
Keeping your scalp consistently nourished after any maintenance work supports healthy recovery. My post on How to Keep Your Scalp Healthy and Moisturised with Locs gives you the complete scalp care routine that supports healthy locs through every maintenance method and stage.
Avoid Manipulation for at Least 48 Hours
Give the sections you worked on at least 48 hours of complete rest afterward. Avoid retwisting, pulling, or aggressive styling during that recovery window.
Consequently, the hair settles back into its new configuration without additional stress being applied too soon.
Watch for Buildup
Crochet needle work can sometimes push existing product residue deeper into the loc interior. Therefore, ensure your locs are thoroughly clean before your next session.
Watch for any unusual buildup developing in recently worked sections afterward.
My post on the truth about loc buildup what it is and how to get rid of it gives you everything you need to identify and address buildup before it causes lasting damage to your locs or scalp health.
When to See a Professional Instead
Many people successfully use the crochet needle on their own locs at home. However, some situations genuinely require professional guidance rather than a DIY approach.
If you have significant breakage at multiple root points, please see a loctician first. Extensive gaps throughout several locs also warrant professional attention.
Additionally, any signs of loc rot developing require professional assessment before any repair work is attempted.
My post on what is loc rot and how do you prevent it covers the signs of loc rot clearly. It helps you identify whether your situation needs professional attention urgently before things progress further.
Furthermore, if you have never used a crochet needle before, consider booking a session with an experienced loctician first. Watching the correct technique demonstrated on your actual hair is genuinely invaluable. It is worth far more than any written guide alone.
Final Thought
The crochet needle rewards patience, respect, and a gentle hand more than almost anything else in loc maintenance.
It will not fix everything overnight. Furthermore, it is not a substitute for consistent washing, moisturising, and regular professional appointments.
However, in the right hands, it is one of the most powerful loc care tools available anywhere. It has saved locs that seemed completely beyond saving.
It has given clients back their confidence in locs that were starting to look worn and tired.
If you are managing your own loc journey at home and want a complete guide to doing that successfully, my post on how to loc your hair at home without a loctician pairs perfectly with everything in this post. It gives you the full home maintenance picture from start to finish.
Use the needle wisely. Use it gently. Trust your locs to respond beautifully when you treat them with the care they truly deserve.
Leave a Reply