A young man walked into my studio two years ago with a printed photo on his phone. He held it up and said simply, “I want these.” The photo showed thick, cylindrical locs standing away from the head with a fullness and density that most loc styles never reach. Clean. Bold. Completely distinctive. He had been researching for months and kept coming back to the same style every time.
Those were wick locs. And that appointment turned into one of the most educational consultations I have had in years, because wick locs require a level of planning and commitment that most other loc styles do not.
If you are here because you saw someone rocking wicks and felt that pull in your chest, this guide covers everything you need to know. Before we get into it, make sure your foundational loc habits are solid. A strong routine supports every loc style you will ever try, including this one. Start with how to do a loc bun without headaches or tension for styling basics that carry over into wick maintenance too.
Now let us get into what wicks actually are.
What Are Wick Locs
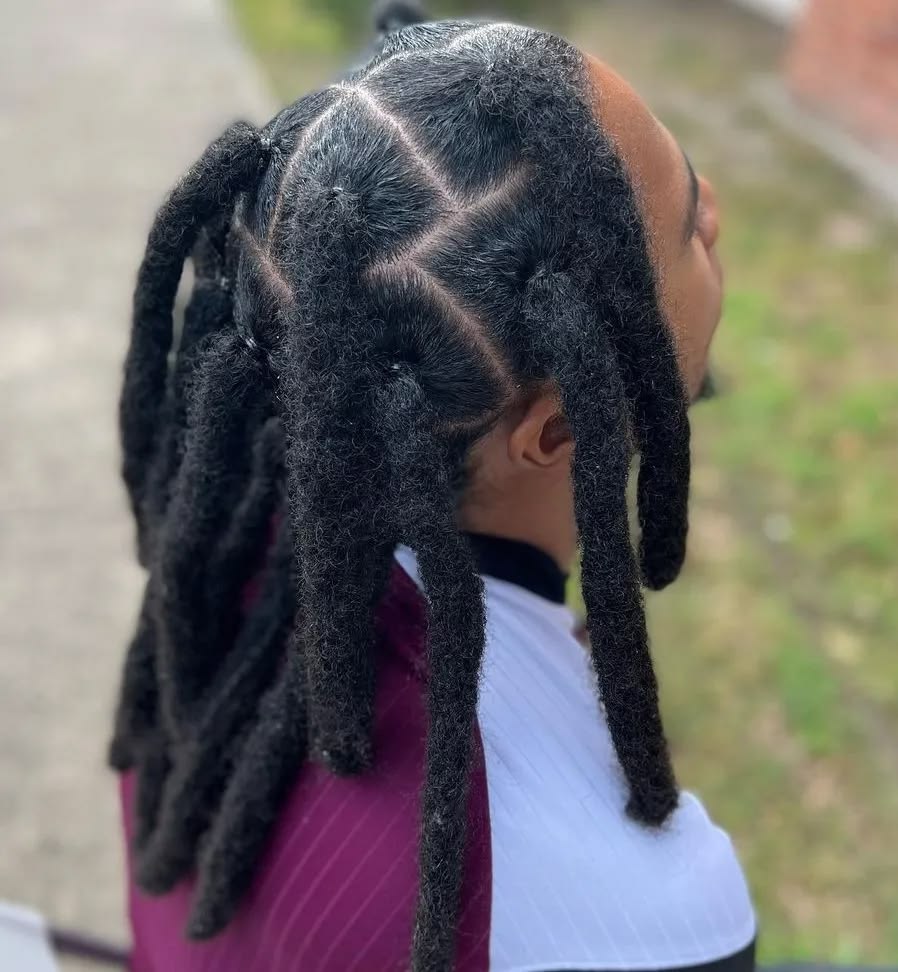
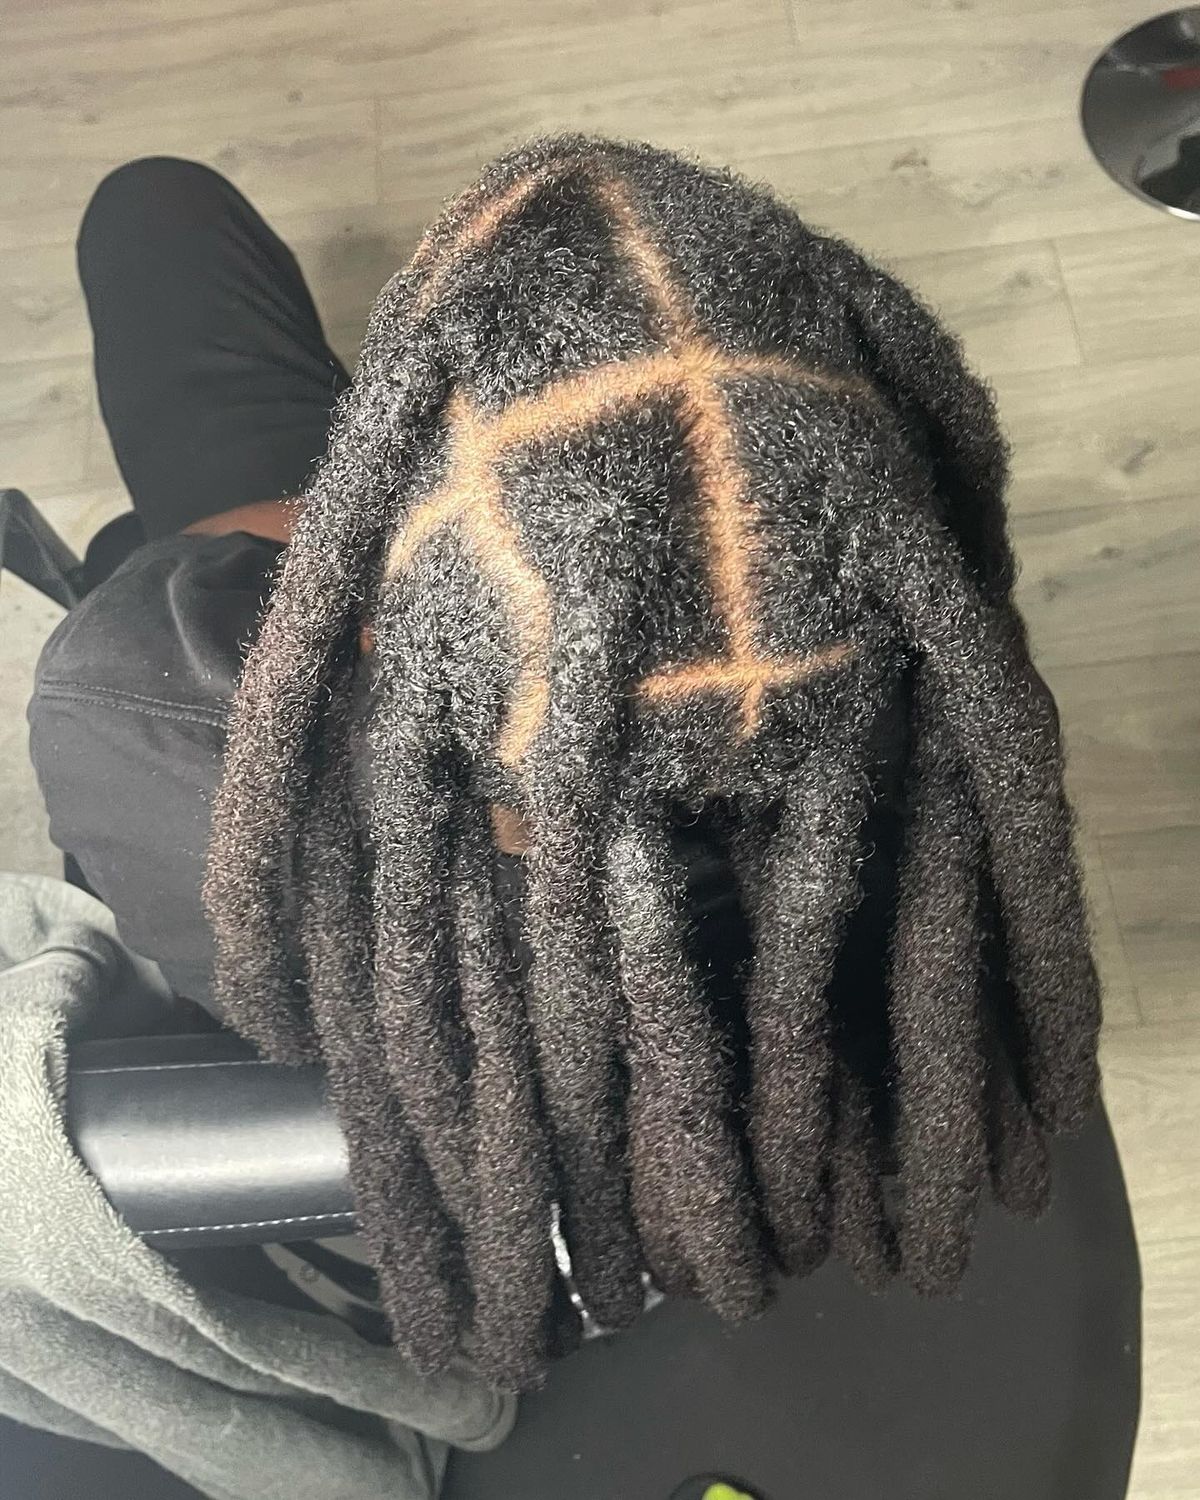
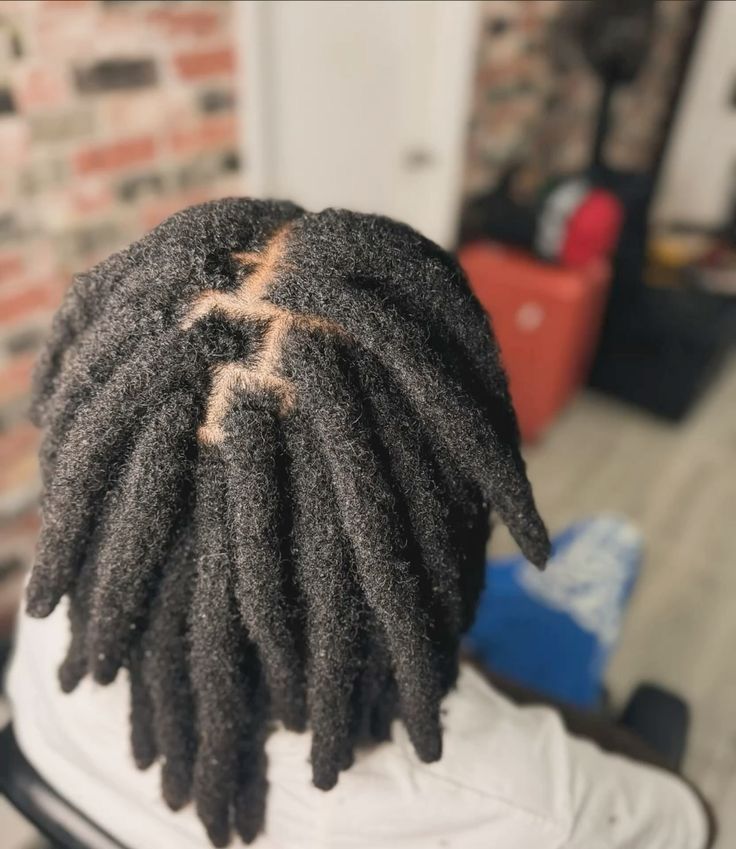
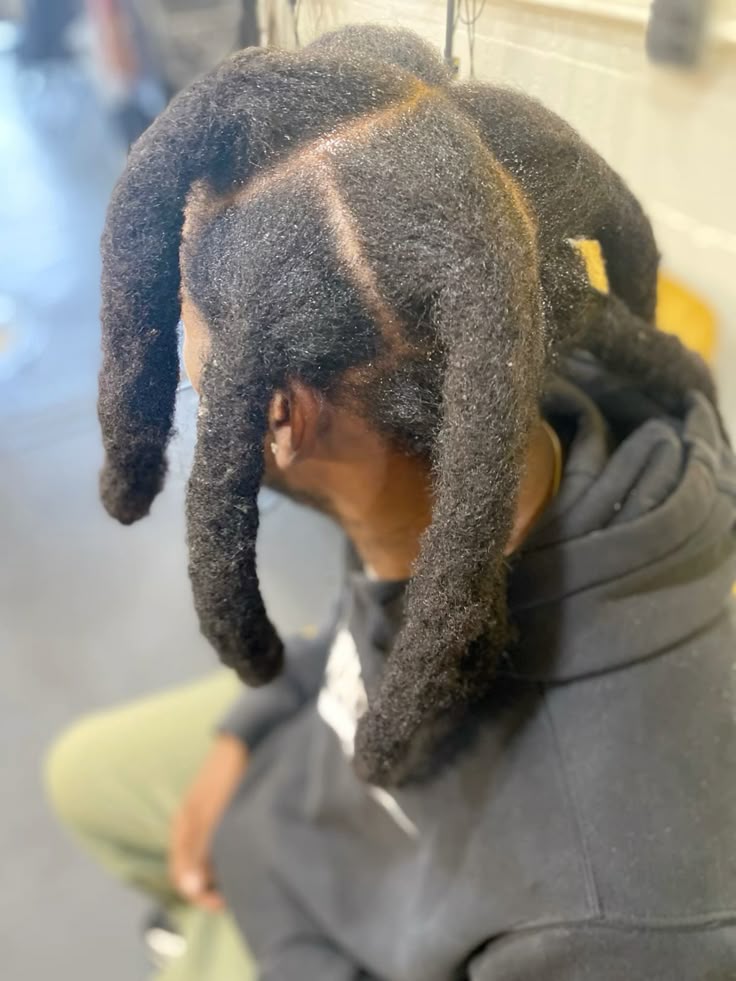
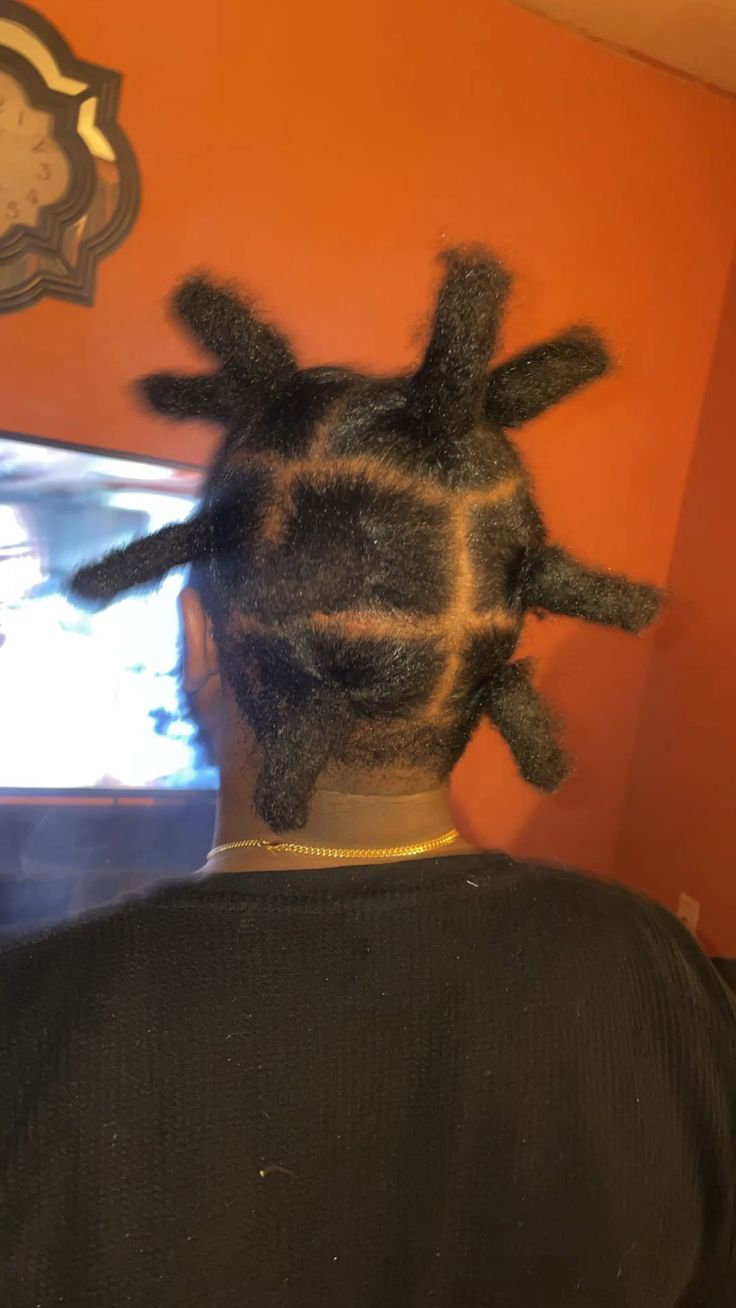
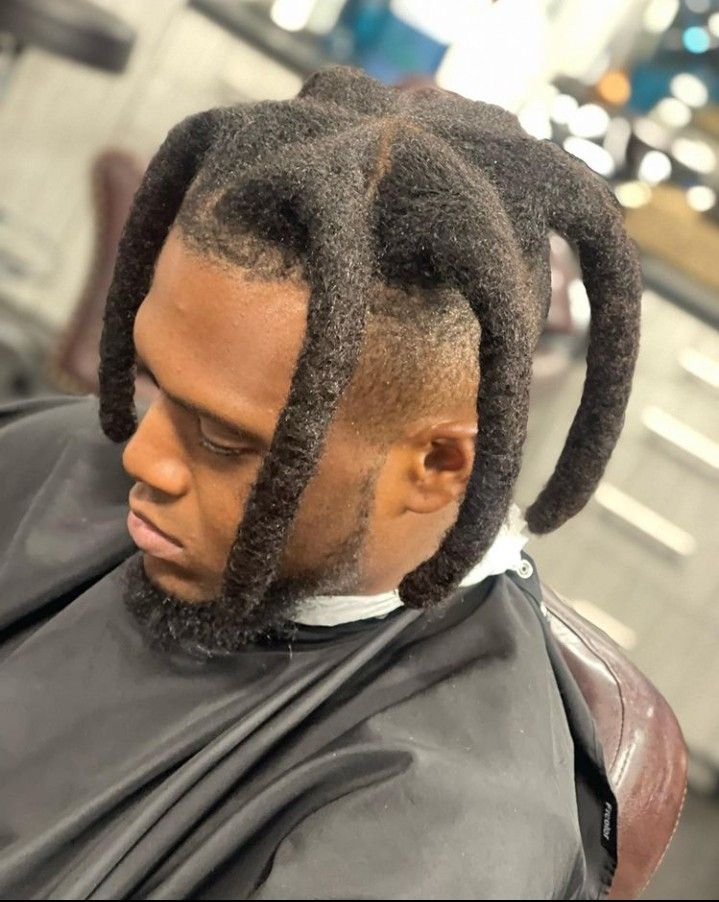
Wick locs are thick, freeform cylindrical locs. They form when multiple locs combine and fuse together into one large, dense unit. The result is a small number of very large locs rather than many smaller ones.
The name comes from a candle wick. The visual similarity is clear once you see them. Round, upright, dense, and uniform in their thickness. Wicks tend to stand away from the scalp rather than lying flat. That natural lift is part of what makes them so visually striking.
Most people with wick locs end up with anywhere from four to thirty wicks total. The exact number depends on how thick each wick is and how much hair the person has overall. Fewer, thicker wicks create a bolder look. More wicks with slightly less diameter give a slightly more versatile result.
Wick locs are most associated with South Florida loc culture. They carry a specific cultural identity and aesthetic that has deep roots in that community. Understanding that history matters. These are not just a trend. They represent a distinct expression of Black hair culture.

How Wick Locs Differ From Traditional Locs
Traditional locs involve sectioning hair into many smaller parts and maintaining each loc separately throughout the journey. The goal is usually defined, individual locs that stay separate from each other.
Wick locs take the opposite approach. The goal is intentional combining. You start with individual locs or sections and deliberately encourage them to fuse together into larger units over time. The loctician controls which locs merge and at what pace.
The texture and structure of wick locs also differ significantly. Traditional locs lie relatively flat against the scalp due to their individual weight and movement. Wick locs are dense enough to stand upright. Their mass gives them a rigidity that individual locs do not have.
Maintenance for wicks is also completely different. Everything from washing technique to drying time to retwisting method changes when you move into wick territory. Understanding traditional locs vs two-strand twist locs: what’s the difference first gives you a clear baseline for appreciating how far wick locs diverge from standard loc care.
Who Can Get Wick Locs
Wick locs work best on specific hair types and head shapes. Knowing whether your hair is a good candidate saves you time, money, and frustration.
Hair Type Considerations
Tighter curl patterns, specifically type 4a, 4b, and 4c hair, produce the best wick locs. These textures have the natural coil memory and density to fuse together effectively. The hair tangles and knots around itself in a way that creates strong, stable wicks over time.
Looser curl patterns struggle with wick formation. The hair does not fuse as naturally. Wicks on looser textures tend to look undefined, take much longer to form, and often require more professional intervention to maintain their shape. This does not mean looser textures cannot achieve wicks. It just means the process is significantly more involved.
If you have biracial or mixed texture hair and you are drawn to the wick look, manage your expectations carefully. The sections with tighter textures will develop beautifully.
The looser sections will need ongoing professional support. Read how to loc biracial or mixed texture hair before starting, because the texture mapping work done there applies directly to planning wick formation on mixed hair.
Hair Density Considerations
Wick locs require significant hair density. Each wick is formed by combining multiple sections of hair. If your hair is naturally thin or low density, you may not have enough volume to create wicks with satisfying size and fullness.
A loctician can assess your density during a consultation and tell you honestly whether wicks are achievable for your hair. Never skip that conversation.
Starting a wick journey on hair that cannot support it leads to thin, weak wicks that look nothing like the reference photos you fell in love with.
Starting Wick Locs: Your Two Main Options
There are two primary ways to start wick locs. Which one you choose depends on where you are in your loc journey right now.
Option One: Starting Fresh With Large Sections
If you are starting your loc journey from scratch and you know from the beginning that you want wicks, you can section your hair into large divisions right from the start. Each large section will eventually become one wick.
Your loctician maps out the sections across your head during your consultation. The sectioning pattern determines how your finished wicks will be distributed. Even spacing creates a balanced look. Strategic sectioning around your crown and sides creates a more sculptural result.
Each large section gets started using the same techniques used for any loc. Palm rolling, coiling, or interlocking all work as starting methods for wick sections.
The difference is simply the size of each section. Because the sections are large, you need a loctician who understands how to handle that volume during the starting process.
For anyone unfamiliar with interlocking as a technique, it plays a particularly important role in wick maintenance. Get educated early. Read interlocking for beginners: what it is and how to do it safely before your first appointment so you can have an informed conversation with your loctician about which techniques they plan to use.
Option Two: Combining Existing Locs
The second option is for people who already have traditional locs and want to transition them into wicks. This involves deliberately combining neighboring locs into fused units.
Your loctician identifies which locs will combine to form each wick. They then begin encouraging those locs to merge at the root during each maintenance session. Over several appointments, the locs at the root grow together and fuse into a single dense unit. The length eventually follows.
This transition process takes patience. Depending on how mature your existing locs are, the combining process can take six months to over a year before your wicks look fully formed. Rushing the process causes uneven wicks and weak fusion points that can split under tension.
The Role of a Loctician in Wick Formation
Wick locs are not a DIY project. At least not in the early stages. The sectioning decisions, the combining technique, and the maintenance approach all require professional skill and experience.
A loctician who specializes in wicks understands how to map sections across different head shapes. They know how to create combining patterns that result in evenly distributed, balanced wicks. They also know when a wick is forming correctly versus when it is developing a weak point that needs attention.
Choosing the right professional for this specific style matters enormously. Not every loctician works with wicks regularly. Ask specifically about wick experience before booking.
Ask to see photos of wick clients they have worked with, understanding what your loctician actually does and what their specialization covers helps you make the right choice. Read what is a loctician and do you actually need one for guidance on evaluating professionals before committing to one for a style this specific.
The Wick Formation Process Step by Step
Step One: Consultation and Mapping
Your loctician examines your hair density, texture, and scalp health. They ask about your goal, how many wicks you want, and how thick you want each one. Together you decide on a sectioning map that suits your head shape and hair volume.
This consultation is not a formality. It is a genuine planning session. The decisions made here shape every appointment that follows. Take it seriously. Come with reference photos. Ask questions. Leave knowing exactly what the plan is.
Step Two: Initial Formation
Your loctician creates the foundational sections or begins the combining process on your existing locs. For fresh starters, each large section gets palm rolled, coiled, or interlocked into a starting loc. For existing loc wearers, neighboring locs get encouraged toward each other at the root using a specific combining technique.
After this first session, your head will look very different from the finished wick look you have in mind. That is completely normal. The early stages of any loc style rarely resemble the finished result.
Step Three: Consistent Maintenance Appointments
Wick formation happens over multiple appointments. Your loctician continues encouraging fusion at the root, cleaning up the shape of each forming wick, and monitoring the overall progress at every session.
How often you need appointments during active formation depends on your hair growth rate and how quickly your sections are fusing. Most people in active wick formation visit their loctician every four to six weeks. Some need more frequent visits during the early stages.
Step Four: The Defining Stage
As each wick develops density and cylindrical shape, the maintenance focus shifts from formation to definition. Your loctician works on shaping each wick so it develops a consistent diameter from root to tip. They also address any wicks that are forming unevenly or developing irregular shapes.
This is usually the most exciting stage because you can finally see the vision coming together. The wicks are recognizable as wicks. The scalp between them is clean and defined. The overall shape of the style is emerging clearly.
Products for Wick Locs
Product selection for wick locs follows different rules than product selection for traditional locs. The density and thickness of each wick changes what products actually penetrate versus what just sits on the surface.
What to Use
Water is still your best moisturizer. Spray your wicks with water regularly. Getting moisture into the interior of a dense wick requires persistence. A fine mist spray bottle works better than a regular spray bottle because the finer droplets penetrate the surface more easily.
Light oils work well for sealing that moisture in. Jojoba, argan, and sweet almond oil are all good choices. Apply them to the surface of each wick and work them in with your hands. Focus on the tips because wick tips are particularly prone to dryness and splitting.
A lightweight aloe-based gel works well for retwisting maintenance. It provides hold without heavy buildup. Buildup inside a wick is much harder to remove than buildup inside a standard loc because the density traps residue deep inside the structure.
What to Avoid
Avoid heavy butters and wax-based products entirely with wick locs. These products sit on the dense surface of each wick and never fully penetrate. Over time they build up into a thick layer that makes wicks look dull, feel heavy, and smell stale.
Buildup in wick locs is a particularly serious problem because the density makes deep cleansing much more difficult than with standard locs. Prevention is significantly easier than correction here. Keep your products light from day one.

Washing Wick Locs
Washing wicks requires a different approach from washing traditional locs. The density and thickness of each wick means water and shampoo take much longer to penetrate to the core. It also means drying takes dramatically longer.
How to Wash
Work shampoo directly into your scalp first. Use an applicator bottle to direct shampoo precisely to the scalp between each wick. Massage it in with your fingertips using a pressing motion.
Then work the shampoo into each wick individually. Squeeze each wick from root to tip multiple times. You are pushing the shampoo through the dense interior rather than just cleaning the surface.
Rinse thoroughly. This takes longer than you expect. Run warm water over each wick while squeezing repeatedly. Rinse until the water running off each wick is completely clear. Residual shampoo inside a dense wick causes flaking and irritation that looks like dandruff.
Speaking of which, scalp issues are common during the wick formation process because the thicker sections change how your scalp breathes and how products distribute. If you notice unusual flaking or itching, get informed before you treat it blindly. Read what really causes dandruff with locs and how to treat it and identify the actual cause before reaching for a product.
Drying Wicks
Drying wick locs takes significantly longer than drying traditional locs. The density holds water deep inside each wick for a very long time. Never wrap wet wicks up or cover them before they are completely dry.
Sit under a hooded dryer for forty-five minutes to an hour after washing. Then check each wick individually by squeezing from root to tip. If any wick feels cool or heavy in the middle, it is still holding water. Keep drying.
Wicks that repeatedly stay damp on the inside develop mildew. Mildew creates a persistent smell that regular washing does not remove. This is one of the most common problems wick wearers face and it is almost entirely preventable with proper drying technique. If you are already dealing with loc odor, address it before it gets worse. Find out why your locs smell and how to fix it for good and tackle the root cause directly.
Detoxing Wick Locs
Because wicks are so dense, they accumulate internal buildup faster than standard locs. A regular detox schedule is not optional for wick wearers. It is essential.
Plan a detox every two to three months rather than every three to six months. The density of each wick simply traps more over the same period of time. Hard water minerals, product residue, and dead skin cells all build up inside the wick core and affect the health and appearance of your style.
The detox process for wicks follows the same apple cider vinegar and baking soda soak method used for standard locs. The difference is in the soaking time and the squeezing technique. Wick locs need a longer soak, up to forty-five minutes, to allow the solution to penetrate the dense interior. Squeeze each wick firmly and repeatedly throughout the soak to help the solution work deeper.
A full guide to the at-home detox process is available at how to detox your locs at home: a step-by-step guide. Follow that process exactly but extend your soak and drying times to account for the additional density of your wicks.
Maintaining Wick Shape Over Time
Managing Wick Size
Wicks naturally try to continue combining over time. Left completely unattended, neighboring wicks will begin to fuse together at the root just as your original sections did. This is fine if you want fewer, larger wicks. It is a problem if you want to maintain a specific number and size.
Check your wicks after every wash while they are still pliable. Gently separate any wicks that are starting to connect at the root. Do this carefully with your fingers, not a comb. Forcing wicks apart that have already begun fusing can cause root damage and thinning.
If any of your wicks are showing signs of thinning at the root, address it early. Root thinning on wick locs can develop faster than on standard locs because the weight of each thick wick puts more stress on the root area. Get ahead of any damage you notice. Read how to fix locs that are too thin, too thick, or uneven for targeted solutions.
Keeping Wicks Clean Between the Roots
The scalp between your wicks needs direct attention. Because the wicks are thick and widely spaced, the scalp between them is very visible. Keep that exposed scalp clean, moisturized, and free of buildup.
Use a fine-tipped applicator bottle to apply scalp oil directly between each wick. Massage gently with your fingertips in small circles. This keeps your scalp healthy and feeds your follicles between appointments.
Growing Your Wicks Longer
Wick locs grow from the scalp like any other loc. But the visible length progress can feel slow because shrinkage during the formation process temporarily shortens each wick as it densifies. The wick is actually getting longer at the root while the fusing process compacts the length visually.
Once your wicks are fully formed and stable, the length progress becomes much more visible. Each inch of new growth is clearly added to the tip of an already established, defined wick.
Supporting that growth comes down to scalp health. Clean scalp, good nutrition, consistent moisture, and minimal root stress all contribute to healthy growth. The science behind loc growth applies equally to wick locs. Read how to grow your locs faster: what science says about loc growth for evidence-based habits that support your wicks from the inside out.
Wick Locs in Professional and Social Spaces
Wick locs make a strong visual statement. That statement is not always received neutrally in every environment. In professional spaces, schools, and certain social settings, people with wick locs sometimes face judgment or explicit discrimination because of their style.
That discrimination is wrong and in many places it is illegal. The growing legal protections around natural hair and loc styles cover wick locs just as they cover any other loc style. Your right to wear your hair in a style that expresses your identity does not disappear when you walk into a workplace or classroom.
Every person wearing wicks should know their legal rights clearly and confidently. Read the CROWN Act and what it means for people who wear locs and understand exactly what protections exist in your state or region. Knowing your rights is not aggressive. It is simply prepared.
Wick Locs for Men
Wick locs have a particularly strong presence in men’s loc culture. The bold, architectural quality of the style aligns naturally with the clean, strong aesthetic that many men with locs pursue. A well-maintained set of wicks on a man reads as intentional, confident, and distinctly polished in its own right.
The maintenance principles for men with wicks are identical to everything covered in this guide. Clean scalp, light products, proper drying, and regular professional appointments form the foundation. The style does the rest.
For men who want to understand how wick locs fit into a broader professional and lifestyle presentation, read men with locs: how to look polished and professional. The principles there work beautifully alongside the bold visual statement that wicks naturally make.
Setting Realistic Expectations
Wick locs take time. They take professional skill. They take consistent maintenance. And they require a genuine commitment to the process over a period of months or years.
The photos you see online of perfect, cylindrical, evenly distributed wicks represent the finished result of a long journey. They do not show the formation appointments, the awkward in-between stages, or the maintenance discipline required to get there.
Set your timeline at twelve to twenty-four months for fully formed, defined wicks. Some people get there faster depending on their texture and density. Others take longer. Either way, the result at the end of a committed wick journey is something genuinely special.
Go in with clear expectations. Find a loctician who specializes in wicks. Build your maintenance routine from day one. And trust the process even when the in-between stages feel frustrating.
Final Thoughts
Wick locs are one of the most distinctive and culturally rich loc styles in existence. They are bold, they are beautiful, and they carry a story with them everywhere they go.
They are also demanding. The formation process requires professional guidance. The maintenance requires consistency. The washing and drying require patience and technique. None of that is meant to discourage you. It is meant to prepare you so you walk into the journey with your eyes fully open.
The young man who came into my studio with that photo on his phone? He stuck with the process for eighteen months. When his wicks finally came together the way he had envisioned, he sat in my chair and just smiled at himself in the mirror for a long time.
That moment is waiting for you too. You just have to commit to the journey that gets you there.
Leave a Reply