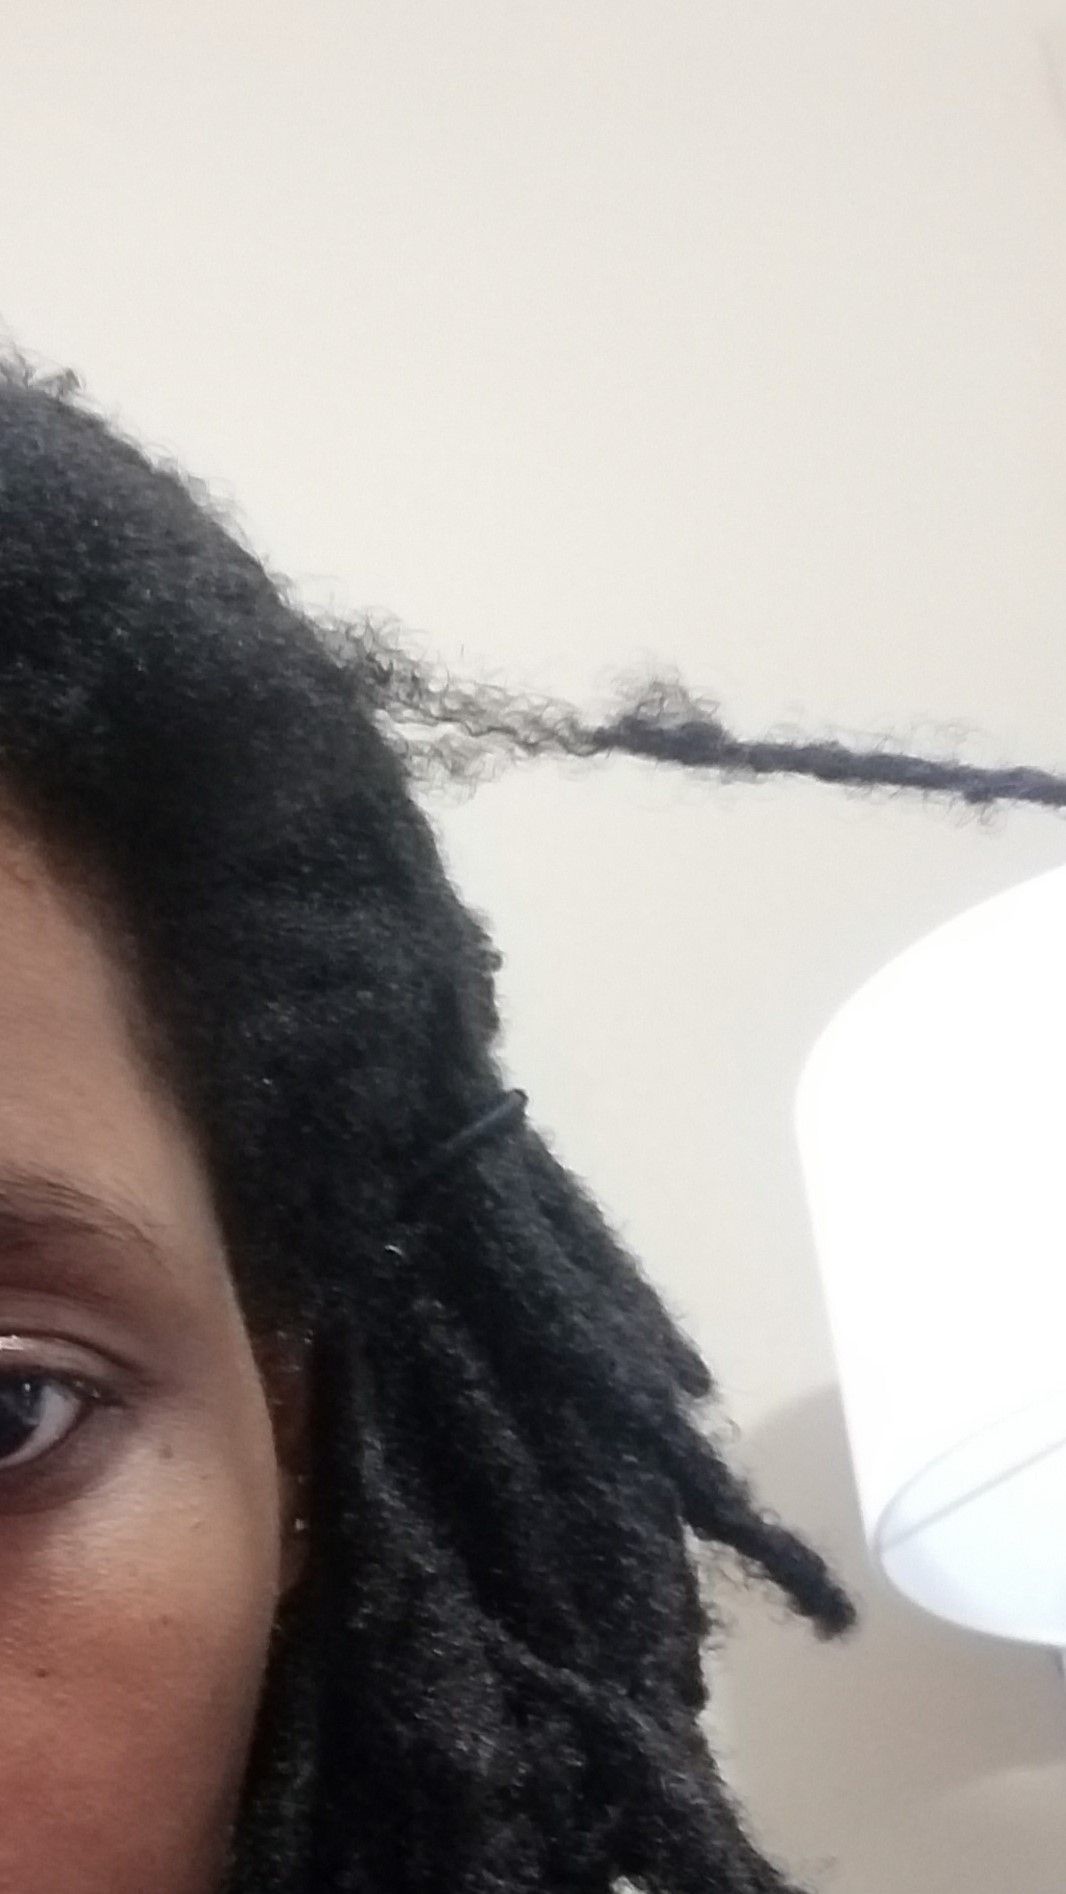
Let me tell you about a client I will call Amara. She came to me one afternoon with her locs wrapped tightly in a scarf. She did not want anyone to see what was underneath. When she finally unwrapped her hair, I could see immediately why she had been hiding it.
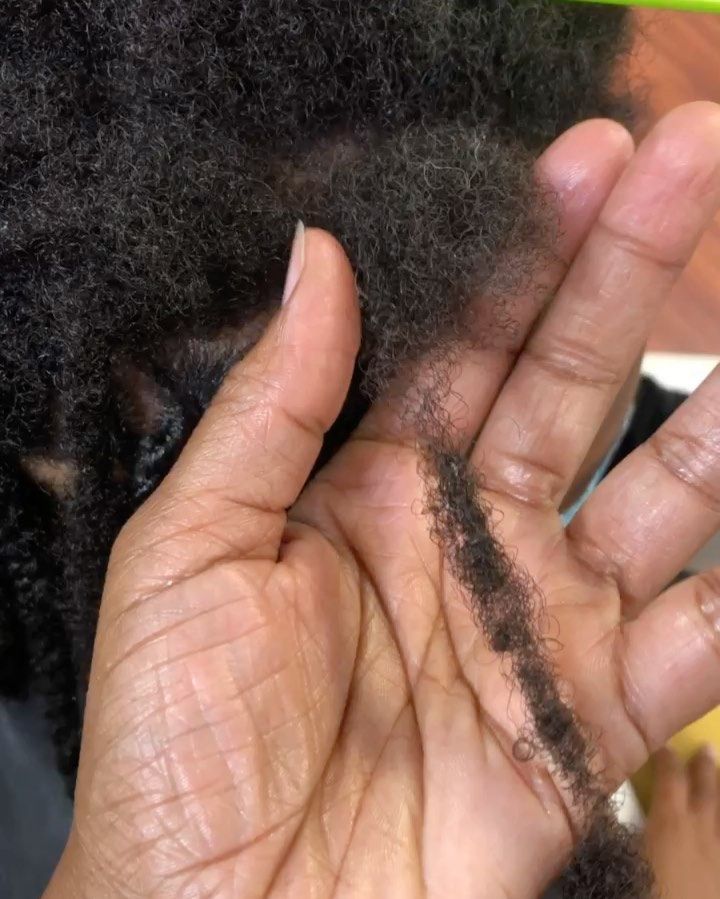
Three of her locs were so thin at the root that they looked like they were barely hanging on. One had already broken completely and was just a loose, detached section sitting in her hair. She looked at me with the kind of eyes that told me she had been crying about this for a while.
I want you to know that if you are reading this in a similar place to where Amara was sitting that afternoon, everything I am about to share is for you. Before we get into solutions though, if you have been silk pressing your locs and noticed thinning afterward, go read my post on how to do a silk press on locs and whether you should because heat damage and thinning are often deeply connected. Now let us get into repairing and restoring your locs naturally and thoroughly.
Understanding Why Locs Break and Thin in the First Place
Amara’s situation did not happen overnight. That is the first thing I told her. Loc thinning and breakage develop gradually over time.
By the time you notice it visibly, the underlying issue has usually been building for weeks or even months already. Understanding the cause of your specific thinning is the most important first step.
The repair strategy that works depends entirely on what caused the problem in the first place.
Tension at the Root
Tension is the number one cause of loc thinning in my experience. It is also the most preventable. Retwisting too tightly, wearing extremely tight updos repeatedly, and installing extensions that pull on your natural locs all put ongoing stress on the root.
The hair at the root of each loc is the youngest and most fragile hair on the entire loc. It simply cannot withstand repeated tension without eventually giving way. A
mara had been getting her locs retwisted every two weeks by someone who pulled very tightly. That two week cycle of aggressive tension had slowly strangled the root of those three locs over several months.
Product Buildup Inside the Loc
Heavy product buildup inside a loc creates a stiff, brittle internal structure.
That brittleness makes the loc significantly more vulnerable to breakage when it is flexed or manipulated. Waxes, heavy creams, and petroleum based products are the main culprits here.
They accumulate inside the loc over time and gradually harden. When a heavily built up loc is bent, twisted, or pulled, it breaks more easily than a clean, flexible loc would.
My post on how to do a deep cleanse for locs step by step is essential reading if buildup is contributing to your thinning problem.
Dryness and Moisture Deprivation
Chronically dry locs are brittle locs. Brittle locs break. It is really that simple at the fundamental level.
When your hair does not get enough consistent moisture, the individual strands inside each loc become dry, stiff, and fragile.
Over time, those dry strands snap under the normal stress of daily movement and manipulation.
The breakage starts at the weakest point of the loc, which is usually either at the root or at a point where the loc has been repeatedly bent or folded in the same direction.
Over Manipulation
Touching, separating, and styling your locs too frequently creates cumulative mechanical damage over time.
Every time you handle a loc aggressively, you are causing small amounts of stress to the hair strands inside it.
Done occasionally, this is completely manageable. Done daily or multiple times a day over months, that cumulative stress adds up to visible breakage and thinning. Less is genuinely more when it comes to loc handling at every stage of the journey.
Assessing the Damage: What Type of Thinning Do You Have
Before you start any repair process, you need to assess the specific nature and severity of your thinning. Not all thinning is the same and not all thinning requires the same approach.
Root Thinning
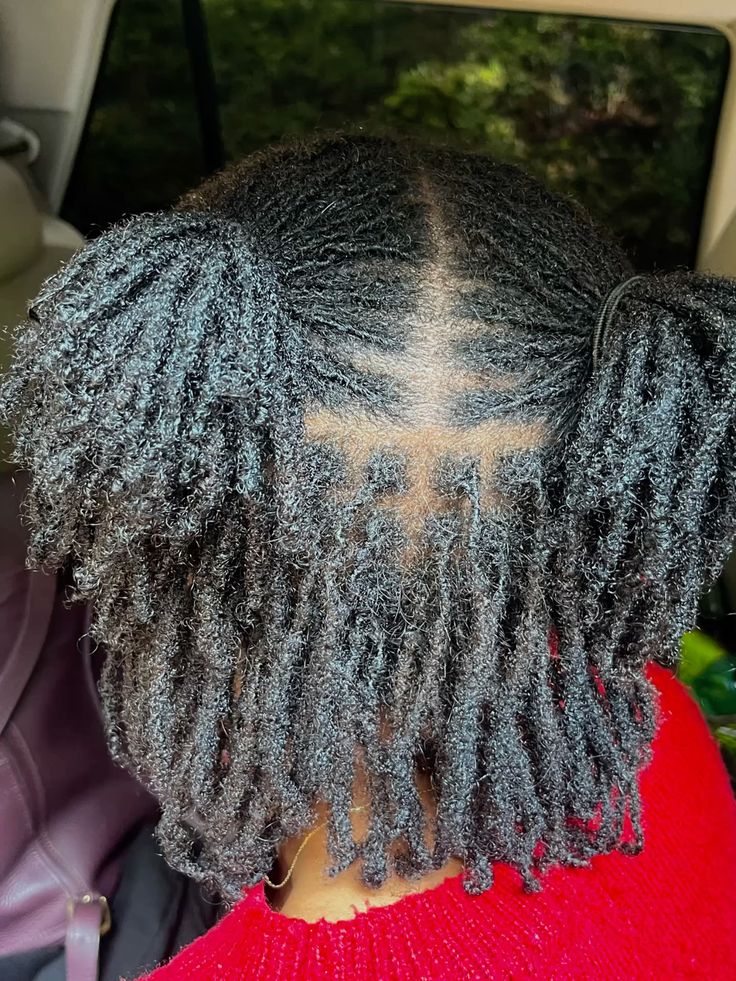
Root thinning is exactly what it sounds like. The loc is visibly thinner at the base near the scalp than it is further down the length.
This is almost always caused by tension damage from retwisting, tight styles, or extension weight. Root thinning is serious because the root is where all new growth originates.
A compromised root produces weaker new growth going forward and is vulnerable to complete breakage if the underlying cause is not addressed quickly.
Mid Shaft Thinning
Mid shaft thinning occurs somewhere along the body of the loc rather than at the root. This type of thinning is often caused by a combination of dryness, buildup, and repeated bending of the loc at the same point.
You might notice it at a point where you frequently fold your locs into a bun or where a hair tie has repeatedly been placed.
Tip Thinning
The tips of your locs are the oldest hair on your entire head. Over time, the very ends of your locs can become thin, fragile, and prone to unraveling or splitting.
Tip thinning is natural to some degree as locs age. However, excessive tip thinning suggests that the ends are not getting enough moisture and protection in your regular care routine.
Complete Breakage
Complete breakage is when a loc has already snapped entirely at some point along its length. The detached section may still be sitting in your hair held in place by surrounding locs.
Or you may have noticed a shorter loc that was previously much longer. Complete breakage is not the end of the world. It can be repaired but it requires a different approach than thinning that has not yet broken.
Save this for your loc journey: 7 things that cause loc thinning and how to stop them

I am going to take you back to Amara for a moment. The loc that had completely broken off was her biggest concern.
She was convinced it was gone forever. I sat down beside her and showed her something that genuinely surprised her.
A broken loc can be reattached naturally without any extensions, without any chemicals, and without cutting anything away.
How Loc Reattachment Works
Loc reattachment works by joining the broken section back to the remaining root section and encouraging the two pieces to grow back together over time.
The key is that both pieces need to still have enough hair to work with. If the broken section is very short or has very little hair left, reattachment becomes more challenging.
However, in most cases where the break is relatively recent, reattachment is absolutely achievable with patience and the right technique.
Step by Step Reattachment Process
Start by cleaning both the remaining root section and the detached broken section thoroughly. Any buildup on either piece will prevent them from bonding properly over time.
Once both pieces are clean and dry, align the broken end of the detached piece with the root section it belongs to. Using your interlocking tool or a crochet needle, carefully work the two pieces together at the point of breakage.
Loop the root hairs through the broken end gently and consistently until the two sections are connected. My post on how to use a crochet needle to maintain and repair your locs has really detailed guidance on using a crochet needle for exactly this kind of repair work.
After joining the two sections, wrap the connection point with a small amount of thread in a color that matches your locs.
This wrapping stabilizes the connection while the two sections begin to grow together naturally.
Leave the wrapping in place for at least six to eight weeks. During this time, be extra gentle with the repaired loc. Do not put tension on it, do not pull it into tight styles, and do not apply heat anywhere near the connection point.

Natural Repair Method Two: Strengthening Thin Roots
For Amara’s two remaining thin locs that had not yet broken, the approach was different. The goal there was not reattachment but strengthening and rebuilding what was already there.
Protein Treatments for Root Strengthening
Protein is the building block of your hair. When your hair is thin and fragile, it often needs more protein to rebuild its structural integrity.
A protein treatment applied directly to your thin loc roots helps reinforce the hair shaft at the cellular level. Look for treatments that contain hydrolyzed keratin, collagen, or silk amino acids.
These proteins are small enough to penetrate the hair shaft rather than just sitting on the surface.
Apply the protein treatment to the roots of your thin locs with a small brush or dropper bottle. Focus the application on the specific thin sections rather than applying it everywhere.
Leave the treatment on for the time recommended by the product instructions. Then rinse thoroughly and follow immediately with a deep moisture treatment. Protein without moisture leaves hair stiff and brittle.
Always balance protein with adequate moisture after every single protein application.
How Often to Use Protein Treatments
For locs that are actively thinning, a protein treatment every two to three weeks is appropriate during the active repair period.
Once the thinning has stabilized and the roots are showing signs of improvement, move to a monthly protein treatment for maintenance.
Overusing protein treatments is also possible and leads to protein overload which makes hair stiff, dry, and more prone to breakage. Balance is genuinely the key here with protein application.
One of the most powerful and completely natural ways to support thin locs is to stimulate the scalp around the thin roots consistently and diligently.
Better blood circulation to the follicle means better nourishment for new hair growth. Better nourished new growth produces stronger, fuller locs over time.
Come back to this when you need it: How to Keep Your Scalp Healthy and Moisturised with Locs
Scalp Massage With Growth Supporting Oils
Mix a few drops of rosemary essential oil with a carrier oil like jojoba or castor oil. Apply this mixture directly to the scalp around your thinnest locs. Then massage the area gently with your fingertips for three to five minutes.
Use small, firm circular motions rather than scratching or pulling. Do this daily for the best results. Rosemary oil in particular has genuine scientific evidence behind it for hair growth stimulation.
One study found it comparable to two percent minoxidil in promoting measurable hair growth over a six month period of consistent use.
Castor oil deserves special mention here as well. Its thick consistency coats the scalp and each loc with a protective, nourishing layer. It is rich in ricinoleic acid which has anti inflammatory properties that support a healthier follicle environment.
Apply it directly to the scalp around thin roots two to three times per week for consistent results.
Bookmark this for later: 7 natural oils that are amazing for loc growth and scalp health
Avoiding Pressure on the Thin Areas
While stimulating the scalp around thin locs, simultaneously avoid putting any pressure or tension on those same areas.
This means no tight styles that gather the thin locs under stress. It also means no tight scarves or bonnets that press directly against the thin roots at night.
Let those areas breathe and receive stimulation without any counteracting tension working against your repair efforts.
Keep this guide handy: 10 best products for soft, moisturized locs that actually work
Natural Repair Method Four: The Wrapping Technique for Mid Shaft Thinning
Remember I mentioned that Amara had a loc that was thinning in the middle rather than at the root.
For mid shaft thinning specifically, wrapping is one of the most effective natural repair techniques available to loc wearers.
How Wrapping Supports Thin Mid Shaft Sections
Wrapping involves using thread, embroidery floss, or thin yarn to wrap around the thin section of the loc.
The wrapping does two things simultaneously. First, it provides structural support to the thin area and reduces the risk of the loc snapping at that point during daily movement.
Second, it protects that vulnerable section from further environmental damage, friction, and manipulation while the hair underneath gradually rebuilds its strength.
How to Wrap a Thin Loc Section
Choose a thread color that closely matches your loc color for a seamless look. Alternatively, choose a contrasting color for an intentional decorative effect. Start the wrap just above the thin section.
Wind the thread tightly and evenly around the loc. Cover the entire thin area completely and extend the wrap slightly beyond it on both sides.
Secure the end of the thread tightly with a small knot hidden inside the wrap. Leave the wrap in place for at least eight to twelve weeks.
Check it periodically to make sure it is not slipping or creating new tension points along the loc.
I watched Amara’s face change when I explained that a lot of what her locs needed was simply consistent, deep moisture.
She had been under the impression that heavy products meant well moisturized locs. The opposite was actually true in her case.
The heavy butters and creams she had been applying had created buildup that was trapping dryness rather than addressing it.
The Right Moisture Approach for Thinning Locs
Thinning locs need lightweight, penetrating moisture rather than heavy surface coating. Start with a thorough deep cleanse to remove any existing buildup that is blocking moisture from entering the loc.
After cleansing, apply a water based leave in conditioner directly to your locs while they are still damp. Follow with a lightweight penetrating oil like argan oil, sweet almond oil, or jojoba oil to seal the moisture inside the hair shaft.
Avoid heavy butters and waxes on your thin locs entirely during the repair period.
My post on how to keep locs moisturized in dry or cold weather has detailed guidance on moisture layering techniques that work beautifully for locs at every stage including locs that are in active repair and recovery.
Steam Treatments for Deep Moisture Penetration
Steam is one of the most effective tools for getting deep moisture into thin, fragile locs.
The steam opens the hair cuticle gently and allows moisture to penetrate far deeper into the loc than any spray or product applied at room temperature can achieve.
If you have access to a hair steamer, use it once a week on your thinning locs during the active repair period. Apply your moisture products first and then steam for fifteen to twenty minutes.
The combination of product and steam creates a deep moisture treatment that is genuinely transformative for dry, brittle, thinning locs.

Repairing thinning locs while continuing the exact habits that caused the thinning is obviously counterproductive.
During the repair period, your maintenance approach needs to shift to support healing rather than continue causing harm.
Extend Your Retwisting Intervals Significantly
If tension from frequent retwisting caused your thinning, extending your retwisting intervals is non negotiable during repair.
Move to retwisting no more than every eight to ten weeks during the active repair phase. This gives your roots the rest and recovery time they desperately need.
My post on how often should you really be retwisting your locs gives you the full framework for finding a retwisting schedule that serves your hair health rather than working against it.
You’ll want to revisit this: What Happens When You Stop Retwisting Your Locs
Switch to Interlocking if Retwisting Is the Problem
For some people, the tension pattern created by retwisting is simply not compatible with their specific hair type and loc structure.
If you have repeatedly experienced root thinning and retwisting is your primary maintenance method, switching to interlocking may be one of the most important changes you can make.
My post on interlocking for beginners what it is and how to do it safely walks you through everything you need to know about making that switch safely and effectively.
Don’t lose this post: 6 Differences Between Retwisting and Interlocking You Need to Know
Simplify Your Product Routine
During the repair period, simplify your product routine dramatically. Use the minimum number of products needed to keep your locs clean and moisturized.
Every additional product you add is another potential source of buildup. Buildup adds weight to thin locs and creates brittleness that makes breakage more likely.
A simple routine of a gentle cleanser, a water based moisturizer, and a lightweight sealing oil is genuinely all that most thinning locs need during the repair phase.
Save this for future reference: What Type of Hair Is Used for Soft Locs and How to Choose
Amara’s Outcome
I want to close the loop on Amara because her story has a really beautiful ending. She came back to see me eight weeks after that first appointment.
The broken loc had been reattached using the technique I described earlier and the wrapping was holding beautifully.
The two thin root locs had noticeably more body and strength at the base than they had had at our first meeting. She had been doing her daily scalp massage faithfully.
She had switched to a simplified product routine. She had also moved her retwisting schedule to every ten weeks. And most importantly, she had stopped hiding her hair under a scarf.
She was not fully healed yet at that eight week mark. Loc repair is a slow process and her roots needed several more months of consistent care before they would be back to their full strength.
But the trajectory had completely changed. She was moving toward health rather than away from it. And that shift in direction is everything when it comes to repairing thinning locs.
How Long Does Loc Repair Actually Take
This is the question everyone wants answered and the honest answer requires some nuance. Loc repair does not happen quickly. It is a gradual process that unfolds over months rather than weeks.
Pin this for later: Soft locs vs permanent locs: everything you need to know before choosing

Realistic Timelines for Different Types of Damage
Root thinning that is caught early and addressed consistently typically shows noticeable improvement within three to four months of proper care.
More advanced root thinning that has been developing for a long time may take six months to a year to fully recover. Mid shaft thinning supported by wrapping and moisture restoration often improves within two to three months of consistent treatment.
Complete breakage that has been reattached needs a minimum of six months of careful nurturing before the connection is strong enough to be considered reliable.
Keep this in your loc care toolkit: 12 things to buy before you start your loc journey
The Importance of Consistency Over Intensity
The single most important factor in loc repair is consistency rather than intensity. Doing your scalp massage every single day is more valuable than doing an intensive treatment once a month.
Moisturizing your locs lightly but consistently every few days is more valuable than a heavy moisture session once a month.
Consistent gentle care repeated over time produces far better repair results than sporadic intensive treatments ever will.
Final Thoughts
A broken or thinning loc is not a death sentence for your loc journey. It is a signal from your hair that something needs to change.
The sooner you hear that signal and respond to it thoughtfully and gently, the sooner your locs begin moving back toward the health and fullness you want for them.
Be patient with the process. Be gentle with your hair. And be kind to yourself during this season because repairing thinning locs requires emotional resilience as much as it requires practical knowledge.
Your locs have been through a lot. So have you. Both of you deserve the care and patience that genuine repair requires.
If you want to keep building your repair and maintenance knowledge, my posts on how to fix locs that are too thin, too thick, or uneven and what happens when you stop retwisting your locs are both really valuable next reads that connect directly to everything we covered here today.
Your locs are worth fighting for. Keep going.
Leave a Reply